Saturday, November 8, 2014

7 & 8 Nov 14 – Day 1 & 2 (Melbourne City)

I reached the airport about 8pm, checked in and then walked around. There was The Social Tree located at the terminal's Central Piazza, right after immigration counters where travellers can take photos or videos of themselves using one of the touchscreen photo booths and then post to the system. So I took a photo of myself and set it to send to my email. I took a photo of the tree as well before moving off to browse the shops and then finally waited outside the designated gate.


Boarded the plane at 9:25pm but the plane only took off at 10:47pm. I didn't manage to get a window seat and so ended up sitting between an old Indian lady and a young Indian lady who incidentally reminded me of a friend, similar build, very vocal and expressive. They almost got into an argument over the lights. Both the young lady and I had our backpacks stowed away under the front seats which should be fine, however, the air stewardess insisted that we put them in the luggage compartment above. The young lady tried to argue with the air stewardess that she has always put it below the seats whenever she travels but in the end, she lost the argument. Watched “Guardians of the Galaxy” and ate dinner. Wanted to continue with “How to Train Your Dragon 2” but gave up halfway because I was sleepy and I knew I don’t have many hours before landing so slept at 1+am. Slept on and off and soon it was time for breakfast but I didn't eat. 

The plane landed at 8:25am and I was off the plane by 8:35am. I used the self-service kiosk to clear the custom. Apparently there is an agreement between the Australian government and Singapore government to implement this SmartGate, an automated border processing system that enables eligible travellers arriving into Australia's international airports to self-process through passport control. Then I went to collect my luggage which took a long time to come out. Only got out of the airport by 9:30am and went to buy the one-way Skybus ticket from the booth outside the airport. There were already a couple of buses beside the booth so boarded the first one which departed around 9:37am. The bus had wifi so whatsapp little big sis while on the way to Southern Cross Station. Got there at 9:57am and proceeded to the booth to arrange for the hotel transfer. Saw a 7-11 but didn't go in to buy the MyKi card because I was told to wait at the waiting area for the hotel shuttle. Soon me and a few travellers boarded the shuttle bus and we were dropped off near our different hotels with mine being opposite of where I was dropped off at 10:10am. 

Found the entrance to the hotel, which was not very prominent, and went to the reception counter. The staff said I was very lucky to have a room available for check-in because the official check-in time should be 2pm. Collected the cardkeys and went up to my room which was at a corner behind another door. It was very secluded. I unpacked a little and used wifi to whatsapp little big sis. I remembered reading that the hotel provides free wifi, however, I was prompted about the charges when connecting. The piece of paper that the staff gave me also stated about free wifi for the first 24 hours but indicated that guest would need to check with the reception for details. Too lazy to check so just chose the first package which cost A$14.95 for 24 hours, thinking maybe it will be free-of-charge when I check-out. I rested till 11:25am before going out again. 

Went to the Asian supermart next door to get MyKi card and asked for directions to Fitzroy area. The lady was not very sure and pointed in the direction of Victoria Street. So went there to try and find the tram stop with tram number 96 but couldn’t find it. Given the hot weather, I gave up going to Fitzroy and just walked around the hotel and tried to find the Queen Victoria Market (QVM) which was supposed to be a five-minute walk. Walked for about 1+hour and still couldn't locate QVM, worse, I was in Chinatown area which meant that I was way out of range. Tried to retrace my steps and saw Melbourne Central Shopping Centre. I was perspiring and so popped into the shopping centre to escape from the heat which was about 37 degrees. Walked around the shopping centre and bought a nice silver pinky ring from a stall on level 1 before heading to Coles at the basement to buy plain muffins and two bottles of fruit juice as breakfast for the next few days. Wanted to get bread but their loaves were of jumbo size which I couldn't finish. Contemplated as to whether I should get jam as well or try my luck again at finding QVM. In the end, I decided to try my luck and luck was on my side because I saw a few tourist guides dressed in red like those in Seoul and approached one of them for direction to QVM.


Followed her instructions and finally found QVM but only left with 2 hours to shop. Took a few quick shots of the place and started to browse the stalls. Bought a bottle of Raspberry & Rhubarb Jam from Sauced Fine Preservatives, a stall which was on my shopping list. Then bought some yellow peaches and apricots from another random fruit stall before stopping in front of Flowerdale Winery stall contemplating if I should to get a bottle of wine but in the end I didn't buy. Felt hungry and bought a spicy potato borek for A$3 as lunch. Stood on the side to eat but only managed to finish half because it was huge. Walked back to the hotel, blasted the air-con once I was in the room while messaging little big sis on and off. Dozed off on the bed and soon it was almost 6pm. The temperature outside seemed to have cooled down because I opened the window to check. Part of me wanted to go out to look for dinner but I was really too tired for that. So in the end, I stayed put and ate the leftover from lunch as dinner before showering and resting for the day. Watched “Twilight” on tv and slept around 10+pm.


Thought: Taking half day leave and not watching too many movies while on the plane means no headache the next day. However, the brutal heat and glaring sun in Melbourne gave me the headache. There are a lot of small lanes in Melbourne city and so it was kind of confusing for me to navigate. Back home, we were trained to follow the traffic rules but in Melbourne, people just cross the road as long as there is no traffic so I just follow the crowd. Hehehe...

Wednesday, October 22, 2014

22 Oct 14 (Wed - Deepavali) - Pumpkin Walnut Ice Cream (金瓜核桃雪糕)

Still in the midst of the Halloween fun mood and because I so love the Fall (Autumn) season hence wanted to make a dish or dessert using... what else but the pumpkin! I have tried making pumpkin soup (both sweet and savory), pumpkin paste and pumpkin mochi cake so what's next? I have long toyed with the idea of using pumpkin as an ingredient in ice cream. I searched the Internet about pumpkin ice cream but the results were usually those of custard base or using heavy cream or banana or adding a lot of spices such as cloves and nutmegs.

I just wanted a simple pumpkin ice cream recipe but... but... So in the end, I decided to adopt the mango ice cream recipe that I have and just swapped the mango puree with pumpkin puree. Went to NTUC Finest and saw a few types of pumpkins: the real Japanese pumpkin at $7/kg; the Japanese pumpkin from Australia at $5.50/kg; the blue pumpkin from Australia at $5.50/kg; the orange pumpkin from Indonesia at $2.50/kg and also the butternut squash at I can't remember the price. I think I spent at good 15 minutes deciding which type to get and how big a slice to get then finally settled on a slice of 300+ gram of Japanese pumpkin from Australia.


Since I wanted this recipe to be a success, I went online to search if I should boil or steam the pumpkin and I found out that it is better to use the steaming method so as to avoid letting the pumpkin absorb too much water. I went a step further to search on how to store leftover puree and found out that it can last a few weeks in the freezer. Sounds good!

While some of the Internet recipes included pecans as part of the ingredients or as topping, I thought maybe I can add crushed walnuts instead since I didn't have pecans. The result? A golden color ice cream with fairly strong pumpkin fragrant. Yum! To add on to the Halloween fun, attempted my very first dessert plating by drawing a spiderweb with a tiny spider.


Packed some to bring to office for my close group of food buddies to try. Wonder what their comments will be. Looking forward!

Ingredients:
200g to 250g pumpkin slice
20g to 25g castor sugar
200ml whipping cream
80g icing sugar
some crushed walnuts

Method:
1.  Cut the pumpkin into small pieces and arrange them upright on a plate
2.  Steam the pumpkin pieces for about 10 minutes or till soften
3.  Remove the skin of the cooked pumpkin pieces and set aside
4.  Whisk whipping cream till foamy for about 3 mins
5.  Add icing sugar in three batches, whisk the mixture after every addition and set aside
6.  Measure 160g of pumpkin pieces and place them in a blender together with the castor sugar
7.  Blend till smooth, add to the whipping cream-icing sugar mixture and whisk till well combined
8.  Pour mixture into a container of your choice and put into the freezer
9.  Remove from freezer after 2 hours to churn* with a fork
10.  Repeat step (9) for another two times** before freezing it overnight

* Try to churn the mixture in a whisking manner to try to incorporate as much air into the mixture as possible

** Mix in the crushed walnuts on the second churning

Note #1: The leftover pumpkin piece can be drained, blitzed and stored in the freezer. Good for a few weeks.

Note #2: This recipe incorporated the making of the pumpkin puree because it is best to make the puree just before using it so that any excess water absorbed during the steaming can be drained off before blitzing.

---------------- Edited on 23 October 2014 ----------------

The comments for the ice cream were all very positive. TYY said that she can smell the pumpkin fragrant as the ice cream melts. Looks like the ice cream is a successful attempt!

Sunday, October 19, 2014

19 Oct 14 (Sun) - Eyeball Osmanthus Jelly

Been very busy since last month and only felt happier after crossing the mid of this month. Partly because the worse part of my busy schedule is over, partly because this month is Halloween month and partly because next month I will be traveling to Melbourne for holidays!

I don't really celebrate Halloween but love the mood of it with all the pumpkins and scary decorations all around. So since I am making osmanthus jelly to treat my colleagues, I decided to add a twist to it by making it Halloween themed.

After some brain-storming, the idea of having an eyeball in jelly came to mind. I was contemplating of having eyeball in blue / red / purple colored jelly but in the end decided to just stick with yellow since it was supposed to be osmanthus flavor. Then came the decision whether to leave the osmanthus flowers in the jelly as usual or out. In the end, I left them in because it seemed a bit boring to have just an eyeball in plain jelly.

 Here's staring at'ya!

Eyeball Osmanthus Jelly in Martini Glass

Started off by making the eyeballs using canned longan, lingonberry jam and blueberries. It was fun seeing the eyeballs all lined up on the plate. Then went on to cook the jelly using the usual method and finally assembled the eyeballs and jelly in the 3¼ oz plastic cups I bought from SKP. It was really fun to see the final product take shape. Now to see how my colleagues react tomorrow when they see the jelly.


Happy Halloween!

Ingredients (Makes 20 cups):
20 longans
20 blueberries
some lingonberry jam*
2.5 tsp dried osmanthus flowers
10g konnyaku jelly power
210g sugar
950ml water

Method:
1.  Fill longan with some jam before inserting a blueberry into the opening (scrape away excess jam, if any)
2.  Bring water to a boil in a pot, lower heat, add osmanthus flowers and simmer for roughly 2mins
3.  Add konnyaku jelly powder and sugar. Stir until powder and sugar are fully dissolved then off the flame
4.  Place one "eyeball" into one plastic cup then pour enough jelly solution to cover the eyeball
5.  Let the jelly cool down a bit in room temperature and chill in fridge till the jelly is set

* You can use any jam that is red in color

---------------- Edited on 20 October 2014 ----------------

Packed 20 cups to office for colleagues to try but only my usual group of food buddies ate. I guessed the rest were either too busy to eat or they had forgotten about the jelly or they just don't have sweet-tooth. Anyway, those who ate loved the jelly because this flavor seems to be their favorite (and have since sort of became my specialty in the department). CC saw my post on FB the day before and told me that initially she thought longan plus jam plus blueberry will be grouse but turned out they complimented one and another. She was very excited about the idea of making some herself. Hahaha... Hope I get to see her masterpiece.

Saturday, September 13, 2014

13 Sep 14 (Sat) - Double-boiled Coconut Chicken Soup

Saw this simple recipe from a variety show recently and decided to give it a try. The soup has a nice coconut fragrance which is rather unique. The actual recipe asked for chicken stock and so I DIY my own chicken stock. Since I had leftover chicken stock, I used it to cook rice. The bones had some meat on them and I ate those too so basically nothing was wasted.


Ingredients:
1/4 - 1/2 chicken breast meat, cut into small pieces
1 set of chicken breast bone, cut into 4 pieces
1 small thai coconut
2 bowls of water
4 red dates, rinse
salt to taste

Method:
1.  Place chicken breast bones, chicken breast meat and water into a pot and bring to boil
2.  Lower flame and remove chicken breast meat when it turns white
3.  Let the chicken stock simmer for another 5 -8 minutes and off the heat
4.  Empty the coconut water
5.  Place blanched chicken meat and red dates into the empty coconut
6.  Pour chicken stock into the coconut and leave about 1 cm gap from the opening
7.  Cover the coconut opening
8.  Place the coconut in a pot and fill the pot with water till it covers half the coconut
9.  Bring to boil and simmer for about 45 minutes to 1 hour
10.  Add salt to taste and either eat directly from the coconut or pour into a serving bowl


Sunday, August 24, 2014

24 Aug 14 (Sun) - Tiramisu

Tiramisu has always been my favourite dessert. After I managed to find ladyfingers biscuits in Candy Empire in Vivo City, I decided to buy the mascarpone cheese and the rum essence that I saw in NTUC Finest in 100 AM. 


Searched the Internet for recipes and found three which I then modified to produce this final recipe which I used today. The recipe is able to make about 10 glasses. The end product was not very pretty but fortunately, the taste was good. Out of curiosity, I did some calculations of the cost involved. The mascarpone cheese cost $7, whipping cream cost $3.40, rum essence cost $5.25, Nescafe classic instant coffee cost $2.95 and ladyfingers biscuits cost $3. The total cost of the main ingredients is about $13.40 and if I add on the cost of other ingredients, the total cost should be roughly about $18. So which means the cost price of one glass of tiramisu is about $1.80 compared to the usual $6-8 per serving if you buy from cake shops. 


Ingredients:
20 pcs ladyfingers biscuits
250g mascarpone cheese
200ml whipping cream
200ml strong coffee
2 tbsp rum essence
200g white sugar
3 egg yolks
some cocoa powder
1 square semi-dark chocolate (shaved)

Method:
1.  Combine egg yolks and sugar in a mixing bowl
2.  Bring a pot of water to boil and then lower the heat
3.  Place the mixing bowl with sugar and egg mixture in the pot of hot water and stir for 10 mins
4.  Remove the mixture from heat, let it cool then whip the mixture till thick
5.  Add cheese to the mixture and blend well
6.  Whip the whipping cream till stiff peak form
7.  Fold the cream into the egg mixture and set aside
8.  Dip ladyfingers biscuits one at a time quickly in the coffee and arrange in serving glasses
9.  Spoon some cream-egg mixture over the biscuits
10.  Repeat step 8 & 9 till the biscuits finish and with top layer ending with the cream-egg mixture
11. Dust the top layer with some cocoa powder using a fine sieve and sprinkle some shaved chocolate
12. Chill for 8 hrs before serving

---------------- Edited on 25 August 2014 ----------------

Packed a box of tiramisu to office for my group of food buddies to try and it received many positive reviews. Most of them like the strong rum flavour which doesn't come with high alcohol content. A couple of them said that one improvement can be to use espresso to soak the ladyfingers biscuits so that the bitterness from the espresso can compliment the sweet taste of the cream and rum.

Sunday, August 3, 2014

3 Aug 14 (Sun) - Healthy Tofu

Had a nice dinner at Springleaf Taiwan Porridge Restaurant two Saturdays ago with my little big sis and her husband. We ordered sweet potato porridge, bean sprouts with salted fish, braised pork (aka lo bak), fresh cockles and tofu.  Most of the dishes were soy sauce base and the fresh cockles was particularly interesting as I had never eaten fresh cockles before.


Chatted over dinner with my little big sis and she was telling me that maybe can try to recreate the tofu dish. It got me interested and so decided to try it out today. Also cooked Japanese sweet potato porridge, fried egg with preserved turnip (aka caipo neng) and butterhead lettuce in oyster sauce.


The tofu dish was recreated entirely on my own estimation and memory and I would say it is about 65-70% close to the restaurant version. What do you think?

Top is Springleaf restaurant version; Bottom is recreated by me

Ingredients:
2 firm tofu
pork floss
1-2 cloves of garlic, minced
1/2 tbsp oil

Ingredients for sauce:
1 tbsp dark soy sauce
1 tbsp water
1/4 tsp mirin
1/4 tsp apple cider vinegar
3-4 tbsp sugar

Method:
1.  Rinse the tofu and steam for 10-15 mins over med-low heat
2.  Drain the tofu of excess liquid, cool to room temperature before putting into the fridge to chill
3.  Fried the minced garlic with oil till golden brown and set aside
4.  Mix all the ingredients for the sauce together and cook over low heat till sugar dissolves
5.  Take out the tofu from the fridge and drain away any excess liquid
6.  Pour the fried garlic oil over the tofu
7.  Drizzle the sweeten dark soy sauce over the tofu
8.  Top with generous amount of pork floss before serving

Sunday, July 27, 2014

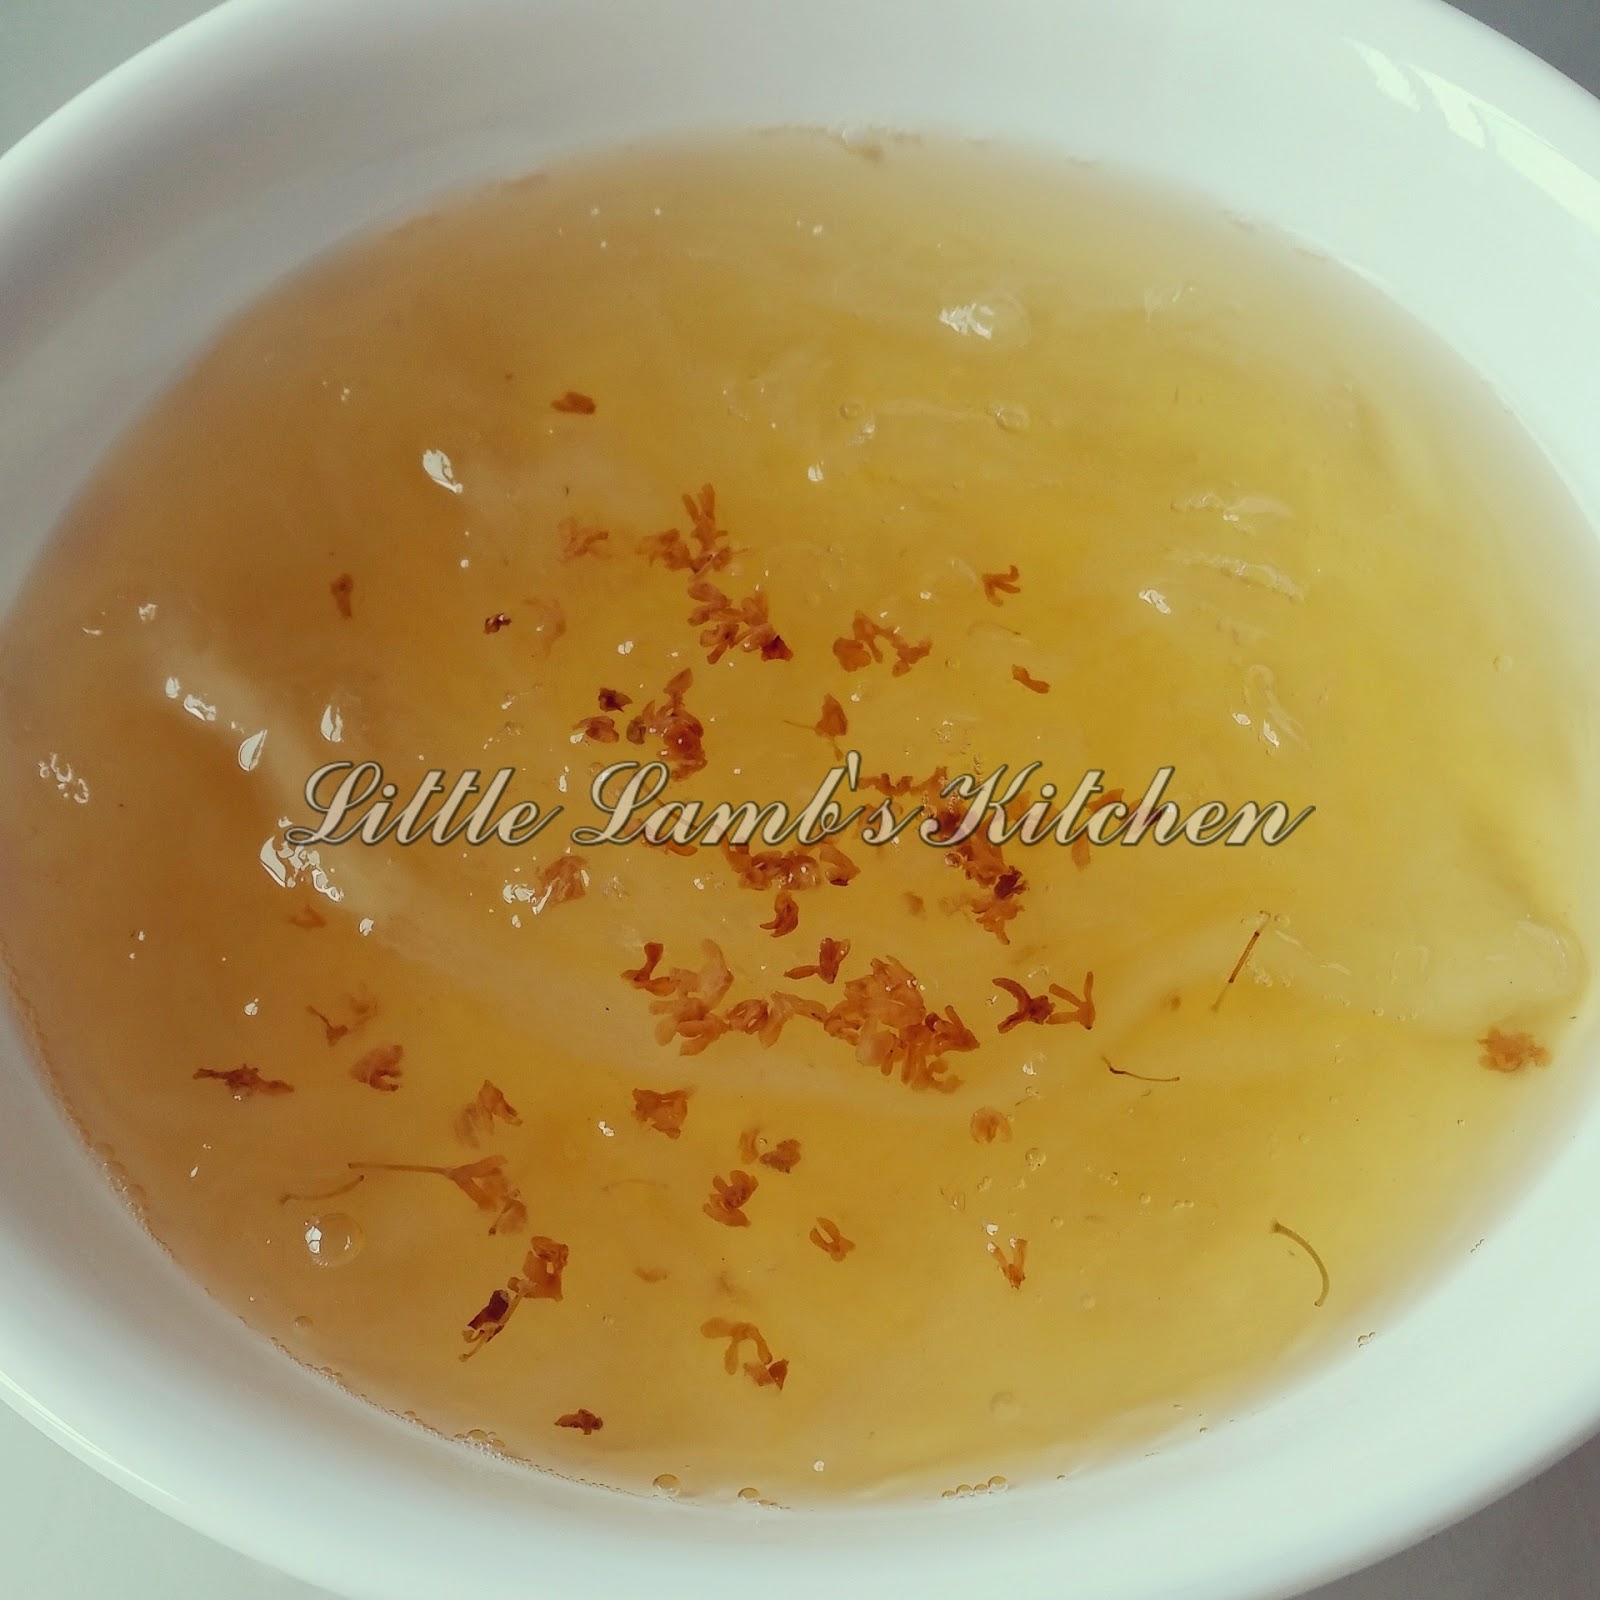
27 Jul 14 (Sat) - Osmanthus Flower Bird's Nest Soup

Received a piece of premium grade white house bird's nest sample from Eden Nest during the week. So decided to cook it for my little big sis who has just recovered from dengue fever last month. Brainstormed for ways to cook it so as to retain its nutrients while at the same time make it interesting. In the end, I decided that simple is the safest bet, especially when my little big sis can be a little bit fussy when it comes to her dessert.

The bird's nest was relatively clean, therefore, not much cleaning was needed after soaking and rinsing, hence, preparing it was a breeze.


Ingredients:
1 tsp osmanthus flower
1 pc bird's nest
1 rice bowl of hot water
2 tbsp rock sugar

Method:
1.  Soak bird's nest for 45 mins - 1 hour or until softened. Remove any feathers or debris using tweezers
2.  Drain and rinse bird's nest using a fine sieve before putting it into a double-boiler
3.  Rinse the osmanthus flower using a fine sieve before putting it into a disposable filter bag for tea
4.  Placed the tea bag into the double-boiler together with the bird's nest
5.  Pour the hot water into the double-boiler and cover it
6.  Place the double-boiler into a big pot and fill the pot with water till it covers half of the double-boiler
7.  Bring the water in the pot to a boil before covering it and simmer over low heat for 1 hour
8.  Stir in the rock sugar to taste and cover for another 5 mins for the sugar to dissolve
9.  Remove the tea bag and serve at room temperature or chilled


Removed some osmanthus flower from the tea bag and placed them into the bird's nest soup for nice effects. Hee...

Wednesday, July 2, 2014

Munch Ministry Homecooks Spotlight Interview

Was invited by Pauline Wong of the Munch Ministry to be featured in their Homecooks Spotlight back in late May shortly after I setup a Facebook page for my blog. Felt really happy to be invited and accepted the invitation immediately. Took me about a week to reply back and have been looking forward to the article since. Finally, saw it being featured in Munch Ministry website today and was really thrilled.

To read my interview with Munch Ministry, click here.

Monday, May 26, 2014

25 May 14 (Sun) - Jackfruit Ice Cream

Still on the ice cream bandwagon and this time I used jackfruit. I used the mango ice cream recipe but with slight modification. Jackfruit is not as juicy as mango so to make it into puree, I added some low fat milk in order to jump start the blending process. The end result was still fairly good, just that the texture of the ice cream was slightly icy but at least it didn't melt very fast. Decorated the ice cream with some jackfruit puree, orange rinds and glazed cherry and voila!


Ingredients:
200ml whipping cream
185g jackfruit puree*
85g icing sugar

Method:
1.  Whisk whipping cream till foamy for about 3 mins
2.  Add icing sugar in three batches and whisk the mixture after every addition
3.  Add jackfruit puree and whisk till well combined
4.  Pour mixture into a container of your choice and put into the freezer
5.  Remove from freezer after 2 hours to churn** with a fork
6.  Repeat step (5) for another two times before freezing it overnight

* Use about 130g-140g of jackfruit (seeds removed) with 4 tbsp low fat milk to blend into puree. Save any leftover puree for decoration
** Try to churn the mixture in a whisking manner to try to incorporate as much air into the mixture as possible

---------------- Edited on 27 May 2014 ----------------

Brought half of the ice cream to office for my group of food buddies to try and the feedback was that the creamy taste was not overpowering and jackfruit bits added texture to the ice cream.

Sunday, May 18, 2014

18 May 14 (Sun) - Mango Ice Cream

Recently a friend posted a photo of the chocolate ice cream that she made and it reminded me that it has been quite a while since my last attempt on ice cream making. So after that day, I brainstormed on what ice cream I can try. Corn ice cream and matcha ice cream came to mind but they flew out of my head after I saw some nice rainbow mangoes from Thailand in NTUC selling at $1.20 each.


Bought two mangoes plus a packet of whipping cream and transformed them into mango ice cream. The end result turned out to be surprisingly good with the right texture and taste. And guess what? It's only using three ingredients!

Ingredients:
200ml whipping cream
150g mango puree
80g icing sugar

Method:
1.  Whisk whipping cream till foamy for about 3 mins
2.  Add icing sugar in three batches and whisk the mixture after every addition
3.  Add mango puree and whisk till well combined
4.  Pour mixture into a container of your choice and put into the freezer
5.  Remove from freezer after 2 hours to churn* with a fork
6.  Repeat step (5) for another two times before freezing it overnight

* Try to churn the mixture in a whisking manner to try to incorporate as much air into the mixture as possible

One thing I learn from this experience is that by churning the mixture in a whisking manner to incorporate as much air as possible into the mixture create a closer texture to the commercially made ice cream. Decorated the ice cream with some dice mango, orange rinds and glazed cherry and presto!


---------------- Edited on 19 May 2014 ----------------

Brought half of the ice cream to office for my group of food buddies to try and it received many positive reviews.

CC and TYY said “Yummy” while NYP exclaimed loudly over the panel that it was really "authentic" and "can really taste the mango". This goes to show that even simple ingredients can be transformed into delicious food.

Recipe submitted to Munch Ministry