Showing posts with label Korean. Show all posts

Sunday, July 11, 2021

11 Jul 2021 (Sun) - Hobak Jeon (Pan-fried Zucchini)

It has been a while since I blogged. The COVID-19 situation and the pro-long work-from-home arrangement killed my mood to blog or do any creative cooking.

Since last year, I have been watching a lot of Korean dramas and variety shows and became interested in their way of cooking. So, I decided to attempt something easy, Hobak Jeon (Pan-fried Zucchini), since I bought a pack of zucchini recently.

Found a simple recipe online by My Korean Kitchen but because I didn’t have plain flour, I made modification to the batter instead. 

Ingredient for Batter:

50g Self-rising flour                                            25g Corn Flour
1 egg                                                                  Pepper
Sugar                                                                 Salt
Water (adjust to the consistency that you want for the batter)

Method:
1.  Mixed all ingredients in a mixing bowl and refrigerate for at least 10 minutes before use


After the batter is ready, just dip the sliced zucchini into the batter and shallow fry in oil. The result was not bad, all things considered. Maybe next round I can make again using the correct flour. 

Sunday, September 27, 2020

27 Sep 20 (Sun) - Kimchi Jjigae

Watched "House on Wheels" and learnt a lot of Korean dishes which I have never eaten before. One of them is Kimchi Jjigae. Re-watched that particular episode a few times to copy the ingredients and steps.

  1) Sauté minced garlic

  2) Add thinly sliced pork belly and stir fry till half cooked

  3) Add bite-size kimchi

  4) Add enough water to cover

  5) Add soy bean paste, oil, Korean chili powder and sugar (optional)

  6) Cut green chili and scallion to 1" length and add in to boil

  7) Cut firm tofu to 1" cube and add in to boil till cooked

  8) Serve hot with rice

Of course, this means that it will not be very accurate and given that I have not eaten the dish before, I do not know exactly how it should taste like. Therefore, I googled for a proper recipe online and found one by "My Korean Kitchen". Modified the recipe I copied from the tv program with the recipe I found online and created this.

 1) Sauté minced garlic

  2) Add thinly sliced pork belly and stir fry till half cooked

  3) Add bite-size kimchi

  4) Add enough water to cover

  5) Add 1 tbsp chili powder, 1 tbsp light soy sauce, 1 tsp Korean chili paste and some sugar

  6) Cut firm tofu to 1" cube and add in to boil till cooked

  7) Cut spring onion to 1" length and add in to boil

  8) Serve hot with rice

The recipe from My Korean Kitchen asked for Korean chili flakes but I do not have it so replaced with chili powder instead. The recipe from the tv program used scallion which I also do not have so replaced with spring onion instead.

Taste-wise, really cannot comment since I do not know how the actual dish should taste like. Haha... Perhaps I should try to eat this dish in a restaurant one day and I will know the answer.

Tuesday, September 22, 2020

22 Sep 20 (Tue) - Kongnamul Muchim (Soybean Sprout Side Dish)

Went to the K-fresh zone at the NTUC Finest over at Tiong Bahru Plaza last weekend and bought a packet of soybean sprouts. Have always wanted to try making Korean side dish also know as Banchan and decided to attempt this one called Kongnamul Muchim (Soybean Sprout Side Dish) by Korean Babsang.

The steps were very easy and this dish can be kept for 3-4 days.

Monday, September 21, 2020

21 Sep 20 (Mon) - Pad Krapow Moo and Pickled Radish & Carrot

Been stuck at home (and work from home) most of the time since the start of the COVID-19 pandemic and thought of trying to grow some edibles at home since I cook more often nowadays. Started with mint which is relatively easy to propagate. Then I decided to grow dill and basil. Went to the NTUC to look for them in the chilled section and bought a box each. Used water to try to propagate some cuttings and used the rest for cooking. So what can I cook using basil? Went back to my favourite dish, pad krapow moo, since I cannot visit Thailand anytime soon. Guess I got to work hard on my plating and cooking of the sunny side up. Heh.

There were some radish and carrot left in the fridge from last week so googled for a recipe to use them. Found one from "My Korean Kitchen" which was easy to follow. Tweaked the recipe to use 75g sugar, 75ml water, 75ml apple cider vinegar and a pinch of salt for a 500g honey jar. Used half of a small radish and half of a carrot. The amount turned out to be just nice. Now just need to chill it in the fridge before eating.

Thursday, August 27, 2020

27 Aug 20 (Thu) - Modified Gimbap

Have always been into Korean cuisine and recently saw a post on the Facebook group "Home-cooked Delights 家常便饭" page that mentioned replacing rice with potato in the making of Korean Gimbap. This is just what I need since I don't have short grain rice. Bought things like cucumber, carrot, potato and seaweed over the weekend for today's attempt. Found my sushi mat hidden away in the corner of my cupboard. Then another idea popped into my head and that is to cook some rice and add to the mashed potato.

Got down to work early in the morning, cutting the cucumber and carrot into strips. Cut and boiled the potatoes, cooked some rice, sliced the leftover smoked duck breast and fried an egg to make egg strips. Then mashed the potatoes, added the cooked rice, seasoned them with some grated cheese and sesame oil. Once all the ingredients were done, it was down to do the rolling. Think I need more practice on that.

It was not too bad for a first attempt but there is always room for improvements. Think I will need to season the potato/rice mixture a bit more the next time.

Thursday, August 20, 2020

20 Aug 20 (Thu) - Gochujang Pork Belly Rice Bowl

 Ever since I read a CNA article on Yeo Jin-goo last month and learnt about his new reality TV program "House on Wheels", I have been following each and every episode of the program faithfully. Each episode brings the viewers to different parts of Korea and the hosts, Song Dong-il, Kim Hee-won and Yeo Jin-goo, will cook meals for themselves and their guests.

In episode 8, Jin-goo cooked Gochujang Pork Belly Rice Bowl for P.O of Block B, his guest and co-star in Hotel Del Luna. Watched that episode and that particular segment a few times to jot down the recipe for it.

Finally got down to cooking it with some modifications to the steps. I like the taste of it but just not sure if it was supposed to taste like this.

Ingredients:

300g pork belly, sliced thinly
2 tbsp oil
4 garlic cloves, minced
2 shallot, minced
1 onion, diced
                   1.5 tbsp honey
                   1.5 tbsp light soy sauce
                   1.5 tbsp vinegar
                   Few heapful of gochujang sauce
                   1 egg, beaten

Method:
1.  Heat up the oil in a frying pan.
2.  Add garlic and shallot and stir fry till fragrant.
3.  Add pork belly and continue to stir fry on medium heat until almost ready.
4.  Add honey, light soy sauce, vinegar, gochujang and onion and continue to stir fry till well mixed.
5.  Increase the heat to high for the sauce to boil down and bubble.
6.  Add beaten egg and continue to stir fry for few seconds then off the heat.
7.  Pour sauce and pork belly over a bowl of rice and serve hot.

Monday, July 6, 2020

06 Jul 20 (Mon) - Stir-fry Kimchi Pork Belly (Second Attempt)

Was not happy with the Stir-fry Kimchi Pork Belly that I cooked last month and so decided to give it another shot. This time round I managed to cut the pork belly into thinner slices and did not marinate them before cooking.

Instead, all I did was stir-fry the pork belly slices for a few minutes before adding kimchi, a dash of light soy sauce and rice wine. Turns out to be even better than the first attempt. So I guess cooking without recipe sometimes works better than following one blindly.

Sunday, June 21, 2020

21 Jun 20 (Sun) - Stir-fry Kimchi Pork Belly

Watched this episode from "I Live Alone" featuring Song Seung-heon where he cooked for his friends when he was filming on Jeju Island. One of the dishes was stir-fry kimchi pork belly and he seemed to just really cooked with just the kimchi with pork belly and no other seasoning. It looked easy enough and I thought of trying it out myself. It was a few weeks ago and I finally got the chance to try the dish out today.

Bought a slab of pork belly from the market and sliced it myself. My knife-work needs more polishing. Tried my best to cut as thin as possible but still not thin enough I think.

Googled a bit about the dish and most recipes called for the pork belly to be marinated with light soy sauce and rice wine. In addition to marinating the pork belly, some recipes called for gochujang (Korean chili paste) and gochujang (Korean chili powder) to be added while stir-frying the dish. As I have neither the gochujang nor the gochujang, I just marinated the pork belly with light soy sauce and rice wine.

The cooking steps were simple. Just add in the pork belly to stir-fry for awhile till half-cooked and then add in the kimchi to cook till the meat is done. Taste-wise, I think the marinate overpowered the kimchi taste. Maybe next round I will not marinate the pork belly and also to use the shabu-shabu sliced pork instead. Nevertheless, it is still a taste of Korea. Hahaha...


After I was done with that, I went on to make the castella sponge cake again. This time round, I made them as cupcakes instead but forgot to lower the temperature some more compared to the previous round and hence, they became wrinkled again. Will need more practice.

Sunday, March 15, 2020

15 Mar 20 (Sun) - Tteokbokki and Mini Oreo Cheesecake

Craved for tteobokki and I had rice cakes and sauce in the pantry. So went to get some flat fishcakes and wongbok to cook. Threw everything into the pot and let it boiled then simmered for another 10 minutes. Yummy!


Saw someone posted this Mini Oreo Cheesecake recipe in the Facebook group "Home-cooked Delights 家常便饭" recently. Watched the video and it seemed simple enough to follow. So went to get the cream cheese and cake cases.

As usual, I played around with the recipe. Instead of using the full 250g of cream cheese, I used 225g and topped up the balance 25g with greek yogurt. Had some blueberries in the fridge, so popped a couple of blueberries in each cake case.

Baked them in the pre-heated oven of 160 degree Celsius for 16 minutes. Took them out to check and popped them back in for another 1.5 minutes. Took them out and left to cool on the rack. Should have keep the duration as 16 minutes, by adding 1.5 minutes, the top of the some of the cheesecakes started to crack. Took one to check and taste. Noticed that it was a bit damp on the bottom, there was condensation. Should have removed them from the silicon cases before letting them cool on the rack.

Should have keep it at 16 minutes.

Just out from the oven.

After removing from the silicon cases.
After removing the cake case.

The cheesecake tasted great and easy to do, so the recipe is a keeper.

Saturday, March 14, 2020

14 Mar 20 (Sat) - Baked Korean Spicy Chicken and Black Glutinous Rice [Bubur Pulut Hitam] Kueh (黑糯米糕)

Bought a bottle of spicy hot sauce from my trip to Busan last year and decided to try it out. Not very sure how to use it so just experimented with the usual chicken wings. Marinated the mid-joint wings overnight with some salt and sauce then baked at 200 degree Celsius for 25 minutes.


Not sure if it was because I was using it in the wrong method or cooking the chicken wings in the wrong method, the taste wasn't great. Just very spicy. Maybe next round, I will try cooking something else with the sauce.

Found a pack of coconut cream which was expiring soon. So had been googling the Internet for easy recipe to use. In the end, I decided to try modify some of the kueh recipes I found online. First, I used the bottom layer recipe from this Seri Muka recipe by Rasa Malaysia. For the top, I adapted the Steamed Coconut Custard recipe from Steam & Bake because I didn't have all-purpose flour to create the top layer from Rasa Malaysia's recipe.

The result was... I also don't know how to describe. The bottom layer was ok, the top not so much. Partly because it was very soft and also I was using the wrong baking tin to steam. When I tried to remove the kueh, the top layer was stuck to the side of the tin. The baking tin was the extendable type so when I extend the sides, the top layer broke.


Taste-wise, I guess I should have used the egg whites instead of the yolk, the yolk taste was a bit overpowering. Found some gula melaka in the fridge, so poured some over the kueh, turned out the taste improved when everything was mixed together.

Will I try again, I guess not.

Sunday, November 24, 2019

24 Nov 19 (Sun) - Korean Ginseng Black Chicken Soup

Bought some fresh Korean ginseng from recent trip to Busan and my little big sis used it to cook Korean Ginseng Chicken Soup using the recipe from The Burning Kitchen.

We used two Korean ginseng roots instead of one because the ones I bought were rather skinny. Not sure if we had added too much water or the ginseng roots I bought were not good enough, the ginseng taste wasn't strong.

Not satisfied with the result, so decided to try again today but with a twist and some tweaks. Yes, I like to play with my food. Kekeke... Instead of large chicken, I used a small black chicken; instead of white glutinous rice, I used black glutinous rice; instead of ginger slices, I used ginger powder and I managed to get fresh chestnuts from the wet market.


Because of this recipe, I went to buy a new pot so that I can use it on the larger ring of my induction cooker. Hrm... I guess the pot width is too wide, I had to add a lot of water in order to cover the chicken and already I didn't cover the chicken in full.

Instead of cooking it for four hours as stated in the recipe, I cooked it for two hours, turning the chicken now and then to cook it all around. The smell from the soup was nice, however, the taste was rather bland and not much ginseng taste. Other than that, it was still good as chicken soup, all things considered.


In order not to make the soup cloudy with all the ingredients inside the chicken, took it out on a separate bowl to remove the ingredients.


Tada, the final product. Obviously, I need to improve on my presentation. Hahaha... Just nice for a rainy weather.

Wednesday, November 9, 2016

A Review: Baro Baro

Was browsing the news feed on Facebook (FB) yesterday and saw a sponsored post showing a cover page with the words "Baro Baro Korean Street Food". I love Korean street food, especially tteokbokki and so went on to check out the FB page. The shop is located in the Tanjong Pagar MRT station and that made me kind of excited. Read the posts on the page timeline and the one of Grand Opening Giveaway caught my eyes. Continued to read in details only to realise that the free lightbulb cooler giveaway is only for any set meal order after 2pm during Monday to Friday. Felt disappointed. Nevertheless, I shared the Baro Baro FB page with my colleague, SWT, and arranged with her to have lunch there today.

Both if us were pretty excited over the shop and even went to google about it. Read through the menu and I was determined to try the noodle tteobokki because I am a sucker for tteokbokki. Heh. While SWT wanted to try the noodle. We thought the shop was over at the basement of the new mall, Tanjong Pagar Centre, which is just next to the Tanjong Pagar MRT station. Searched high and low for it and even went to ask the security guard who hasn't a clue of what we were talking about. Then we decided to try to look for the shop along the stretch of eateries over at the Tanjong Pagar Exchange.


So happy that we finally managed to find the shop. However, the lunch crowd was getting big and SWT suggested getting takeaways. I, on the other hand, suggested eating somewhere else and return to the shop tomorrow for lunch instead. Then SWT changed her mind and was determined to get a table for two. Our effort paid off and we got ourselves a table after about 10-15 minutes. I ordered the Tok Kim Set which consisted of a portion of noodle tteokbokki and a portion of vege kimbab for $9.90. SWT was trying to decide between Spicy Noodle Soup which has a one chili mark and Spicy Dry Noodle which has two chili mark. Knowing that she is not one who can take very spicy food, I told her to try the Spicy Noodle Soup this round which cost $7.

When the food was ready, SWT went to collect. Took some photos before we tucked in. Fortunately SWT heeded my advice because with just one chili mark, she was already having a hard time eating the Spicy Noodle Soup. Can't image if she had ordered the Spicy Dry Noodle. Unlike the other commercialize Korean street food stalls that have localized the taste to suit Singaporeans, Baro Baro maintains the authentic Korean street food standard, i.e. they didn't water down the spiciness of their food. And their kimbab was really full of vegetables with very thin layer of rice, unlike the others that usually contain more rice than ingredients.


We really enjoyed the food very much. I was very happy to be able to find a shop that serve individual portion of tteokbokki that comes with fishcake slices and vegetables near my work place. Highly recommended if you love Korean street food like I do. =)

Name: Baro Baro
Address: 120 Maxwell Road, Tanjong Pagar Exchange, #B1-29/49, Singapore 069119
Opening Hours: 08:00-21:00 (weekdays)
Products: Tteobokki, Kimbab, Ramen, Egg Bread
Prices: Egg Bread ($3), Kimbab ($6), Noodle Tteokbokki ($6), Ramen ($7)

UPDATE: THE SHOP HAS CLOSED.

Saturday, April 6, 2013

6 Apr 13 (Sat) – Kimchi Fried Pasta with Poached Salmon Steak in White Wine and Hanami-Mitarashi Kushi Dango


Time flies. It has been so many months since my last cooking post. Today did some experimental fusion cooking. Kimchi Fried Pasta with Poached Salmon Steak in White Wine as well as Hanami-Mitarashi Kushi Dango.

The first dish was adapted from Aeri's Kitchen’s Kimchi Fried Rice recipe. Instead of using white rice, I opted for wholemeal spiral pasta and instead of fried egg, I opted for poached salmon. So it was kind of like East meets West. I got to say, the taste of Kimchi on pasta was rather unique and having poached salmon instead of fried egg made the dish less oily. Wholemeal pasta has a rougher texture compared to the normal kind of pasta so probably not many people will like it though.


Kimchi Fried Pasta with Poached Salmon Steak in White Wine (Serve 1)

Ingredients:
1/2 piece salmon steak (about 100g)
1/2 cup kimchi, cut to bite-size pieces
1.5 tsp sugar
Pinch of salt
1 tbsp kimchi liquid
1/2 tsp sesame oil
1 bowl cooked wholemeal spiral pasta
Some lettuce, cut strips                                                          
Poaching Ingredients:
1 shallots, thinly sliced
1-2 slices lemon
1/4 cup white wine
1/2 cup water
A dash of salt and pepper


Method:
1.  Heat up some oil, add kimchi, sugar and fry for about 2 minutes
2.  Add cooked wholemeal spiral pasta, pinch of salt, kimchi liquid, 1 tsp oil and fry 6 minutes
3.  Add sesame oil, fry 2 minutes then off the heat and set aside
4.  Combine all poaching ingredients in a pan
5.  Bring to boil and reduce heat
6.  Put the salmon steak so it is half covered
7.  After 2 minutes, turn the salmon steak over
8.  After 2 minutes, off the heat
9.  Arrange pasta, salmon and lettuce on a serving plate
10.  Sprinkle some pasta herbs on the salmon and some chili powder on the pasta

April is Sakura-viewing season and it reminded me of the three colours dango which Japanese usually made during the season. Since I cannot go to either Japan or Korea to view Sakura, had to content myself by eating hanami dango. And because I do not have toppings to go with the dango so I did the sweet soy sauce glaze which I had made previously.

Did a bit of experiment on the dango and that was by using lingoberry syrup to make it pink instead of using red food colouring. Then I used matcha powder to make it green and tried to use orange zest to make it yellow. I supposed I diluted all of them too much such that the colours turned out paler than I would have preferred. Nevertheless, it was a good try.


Hanami-Mitarashi Kushi Dango (Make 12)

Ingredients:
25g glutinous rice flour
1 tsp lingoberry syrup
1 tsp matcha powder
Zest of 1/6 of an orange, diced
Hot water
1 tsp oil                                                                                   
Ingredients (Sauce):
1/2 tbsp light soya sauce
1/2 tbsp mirin
2/3 tbsp sugar
2 tbsp water


Method:
1.  Divide glutinous rice flour into three portions
2.  Add 1 tbsp hot water to orange zest and let it stand 
3.  Add 1 tbsp hot water to matcha powder and mix well
4.  Add 1 tbsp hot water lingoberry syrup and mix well
5.  Add (2) little by little to one portion of the mixture and knead the dough with hands
6.  Tear out some dough and roll it between the palms to make rice balls
7.  Repeat step 5 and step 6 using (3)
8.  Repeat step 5 and step 6 using (4)
9.  Bring some water to a boil in a pot and add in the rice balls
10.  When the rice balls float, remove them from pot and place into a bowl of ice water for 5 minutes
11.  Drain the rice balls and skewer them three to a stick
12.   Heat up the oil in a non-stick pan over low heat and roll the skewered rice balls around for about 5-8 minutes
11.  Turn off the heat and arrange the skewered rice balls on a serving plate
12.  Boil all the sauce ingredients over low heat till thicken*
13.  Turn off the heat, drizzle the sauce over the rice balls and serve

* Amount of sugar and light soya sauce can be adjusted to taste

Recipe for Kimchi Fried Pasta with Poached Salmon Steak in White Wine submitted to Munch Ministry
Recipe for Hanami-Mitarashi Kushi Dango submitted to Munch Ministry

Thursday, July 5, 2012

5 Jul 12 (Thu) - Kimchi Fried Rice

When you have leftover rice and kimchi in the fridge, the next logical thing to cook is kimchi fried rice. Added a sunny side up and these became my quick dinner fix.

Monday, June 4, 2012

4 Jun 12 (Mon) - Song Pyeon

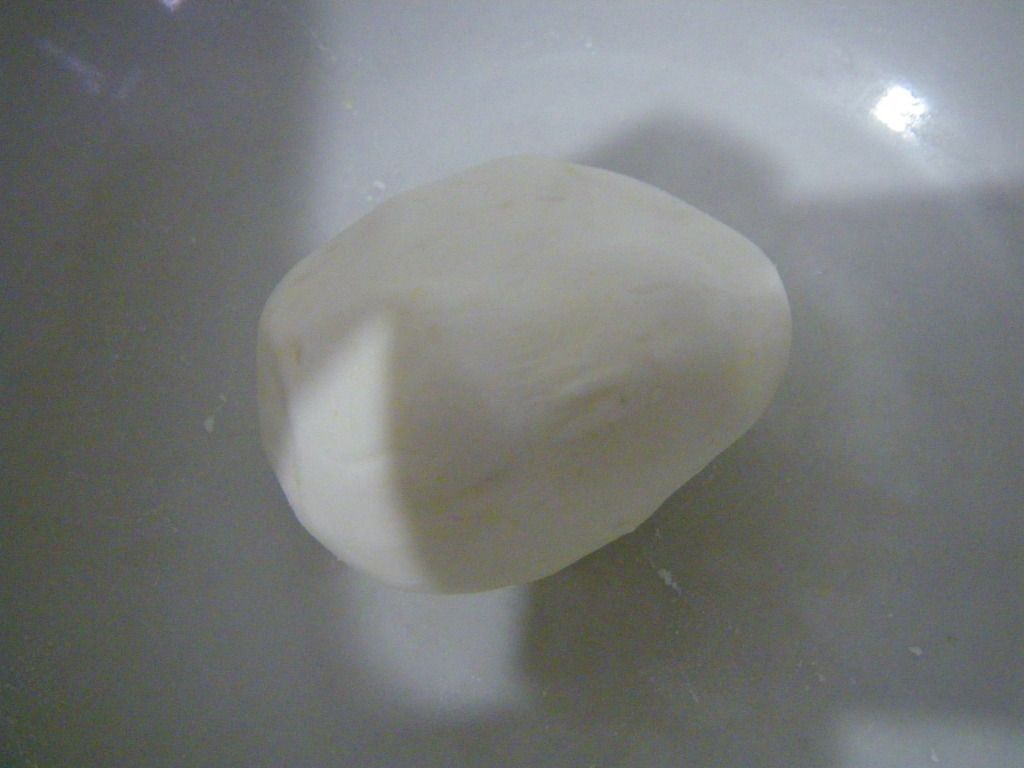
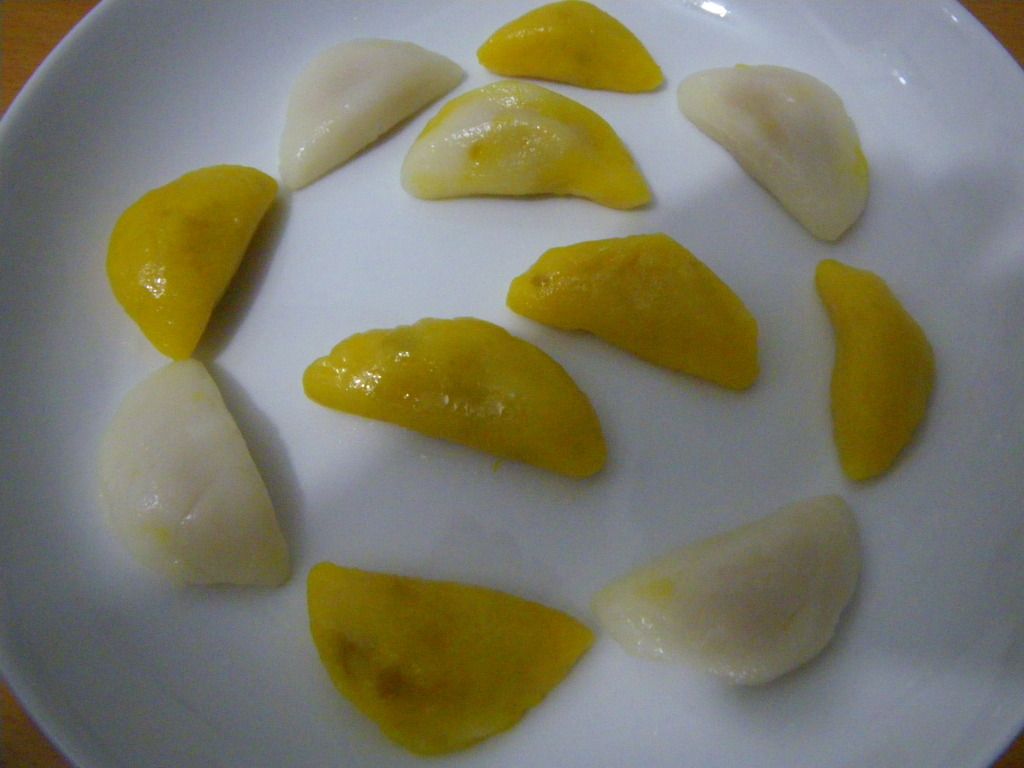
After serveral failed attempts at making song pyeon and yesterday's failure at making the sweet rice and pumpkin tteok, I decided to give song pyeon another try. Googled for recipes and I got confused because some recipes called for glutinous rice flour while some called for non-glutinous rice flour.

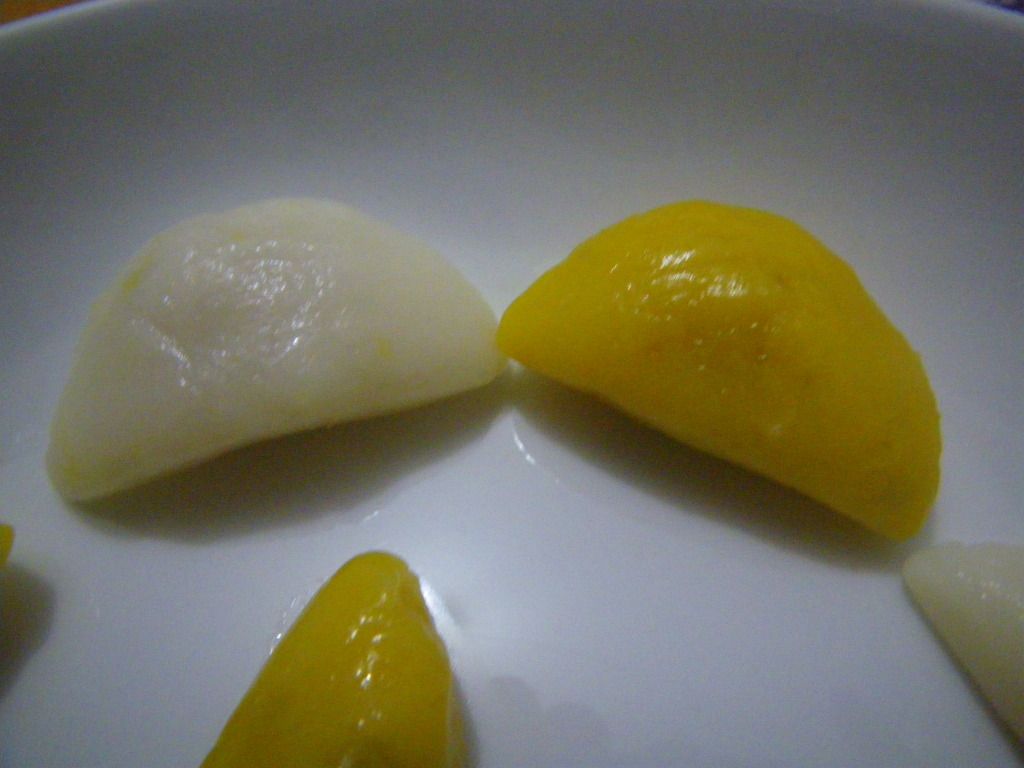
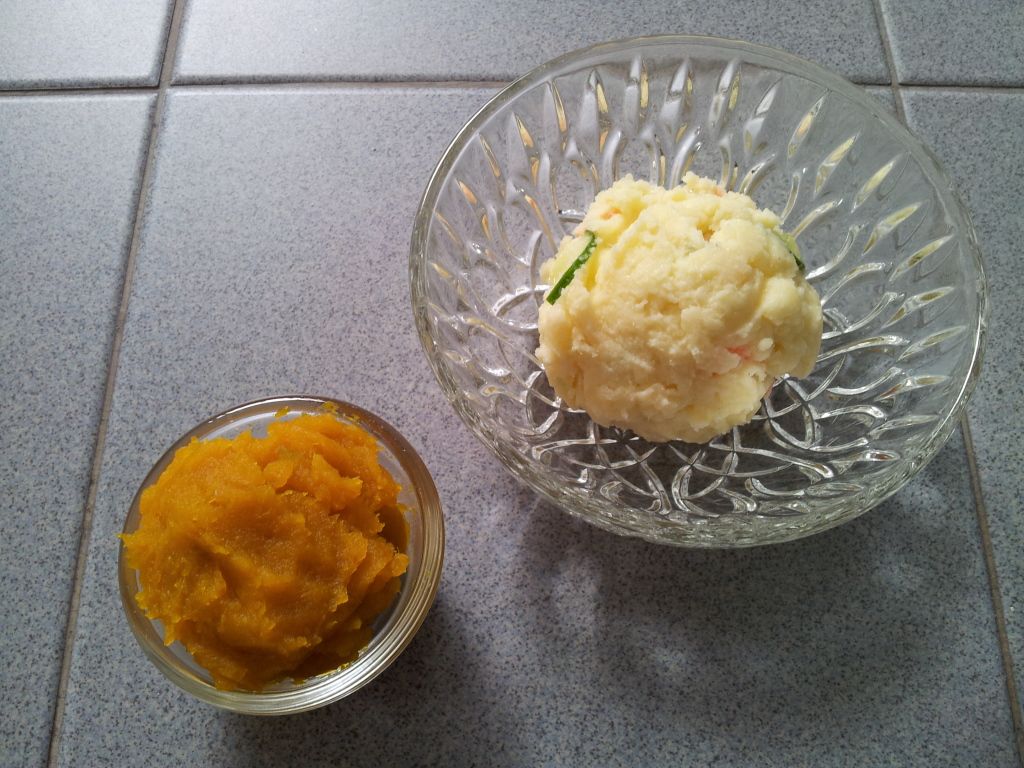
As I only have glutinous rice flour so had to use that instead. And since I still have some pumpkin paste left, so used that as the filling and even mixed a bit of it to make the dough. This time I used the boiling method, the result were not too ugly but still nowhere close to the actual song pyeon which has more shape and volume. Mine were more towards the flat side. I wonder if it has anything to do with the type of flour used or the method of cooking which should have been steaming.


Normal plain dough


Uncook song pyeon

Dough with pumpkin paste added


Cooked song pyeon

Close-up

Sunday, June 3, 2012

3 Jun 12 (Sun) - Pan-fried Fish with Korean Sweet & Spicy Sauce Pasta

It has been a few weeks since my last cooking session. Been brainstorming about what to cook and had a few ideas in mind. Put three ideas to test today and only two were successful. The three ideas were:

1.   Pan-fried Fish with Korean Sweet & Spicy Sauce Pasta
2.   Wasabi Potato Salad
3.   Sweet Rice & Pumpkin Tteok

The first one was quite good surprisingly. The sweet and spicy sauce went really well with the savoury pan-fried fish.


Pan-fried Fish with Korean Sweet & Spicy Sauce Pasta

Ingredients:
75g angel hair
1 piece fish fillet
1/2 onion, cut rings
1 red chili, cut strips
some spring onion, cut into 2"                                            
salt and pepper
2 tbsp oil
cornflour
Ingredients (Sauce):
2 tbsp sugar
dash of pepper
1 bowl of water
1 tsp minced garlic
1/2 tsp light soya sauce
2 tbsp Korean red pepper paste


Method:
1.  Rinse and pat dry fish fillet with kitchen towel
2.  Marinate fish fillet with salt and pepper and set aside
3.  Cook angel hair in salt water and arrange on a serving plate
4.  Coat fish fillet with cornflour
5.  Add 2 tbsp oil to Happycall pan
6.  Fry fish fillet each side for about 5 minutes over low heat
7.  Turn off the heat and arrange fish fillet on the same serving plate
8.  Mix all the sauce ingredients in a bowl and pour into Happycall pan
9.  Cook over medium-low heat and stir constantly till sauce thicken slightly
10.  Add onion, red chili and spring onion and cook for another 1-2 minutes
11.  Turn off the heat and pour sauce over the angel hair
12.  Garnish with more spring onion and serve

The second one was basically just adding wasabi paste to my original potato salad. The third one was an epic failure. Managed to make the pumpkin paste using the Japan green pumpkin and perhaps the rice dough but it was the handling of the dough and wrapping the pumpkin paste that gave me problem. So in the end, I got very ugly tteok and fortunately, I didn't make a lot.

Pumpkin Paste and Wasabi Potato Salad


Recipe submitted to Munch Ministry

Thursday, May 17, 2012

17 May 12 (Thu) - Ni-tamago

Received a message from my little big sis yesterday asking me how to make "hard boiled egg w soft soft yolk like the ramen type". I knew instantly that she was referring to the lava egg, also known as ni-tamago. Actually I googled for the recipe few weeks ago and even attempted it twice but failed in both instances. Asked her why she suddenly wants to cook that and her reply was that her father-in-law likes it after eating it at a ramen shop in Changi Airport T3.

Sent her the two links which I found back then and she attempted it today. Result was undercooked eggs and she gave up trying for today. It got me interested again so I tried cooking it after work. Didn't check the recipes and cook based on my memory. The result? A fairly presentable lava egg! And what's a better way to eat it than with Kimchi Ramyeon!


Ingredients:
1 egg
water
ice

Method:
1.  Take egg out of fridge and thaw for 20 minutes
2.  Boil water and put the egg in when water starts to bubble gently
3.  Cook egg for 7 minutes
4.  Remove egg and put into ice water immediately
5.  Peel egg and leave the egg in the ice water to stop it from cooking further

Saturday, April 14, 2012

14 Apr 12 (Sat) - Spicy Pork BokkEum

Looked through the list of recipes that I intend to try and decided on this spicy pork bokkeum, a Korean spicy fried pork dish that I found in Aeri's Kitchen website. As I didn't want to follow the portion in the recipe so I reduced the amount of ingredients used as well as made some adjustments on my own because I didn't have certain ingredients. Instead of using apple juice, I used packet grape juice; instead of red and green chilies, I used red and green capsicums because the recipe stated red and green hot peppers so I thought it was refering to capsicums and also I added shallots which wasn't asked for.

Tried to follow the recipe closely and I made the silly mistake of adding exactly one tablespoon of light soya sauce that the recipe asked for instead of reducing the amount. Hence, I had to add more sugar to counter the effect. The recipe also asked to marinate the pork for at least 3 hours but I didn't wait for 3 hours and only marinated for about 1 hour.

Tried to cook using the Happycall Pan and the result was a very dark brown color dish. The appearance wasn't even close to the picture on Aeri's Kitchen website. Taste was a bit salty because of my silly mistake so had to eat the dish with rice.

Spicy Pork BokkEum

Saturday, March 3, 2012

3 Mar 12 (Sat) - Grilled Teriyaki Cod Fish with Vegetables and Pan-fried Korean Rice Cakes

Heard so much about Happycall Pan (HCP), saw it on TV and saw my BIL's sister using it that I finally bought mine recently. On TV, it was distributed by Lejel Home Shopping at $108. However, I was told that I could get it for about $63 from Gmarket.


A video on how to prepare and clean Happycall Pan by mamabliss

More information about Happycall Pan by Ellena of Cuisine Paradise

The pan was delivered to my house last week and then I started searching for recipes using the pan. Found loads of them and finally decided to try something simple over this weekend - Grilled Teriyaki Saba by Ellena of Cuisine Paradise. Went marketing last Thursday, could't find the saba fish that was called for in the recipe, hence settled on using cod fish steak instead. Bought a pack of Thai thick asparagus and a single purple carrot. Yes, purple carrot. You heard me.

Cod Fish Steal, Asparagus, Purple Carrot, Garlic
and Shallow
          
           Kikkoman Teriyaki Sauce

As I had some frozen mini Korean rice cakes left, so decided to pan-fried them instead of cooking the usual rice and angel hair. Marinated the fish, minced the garlic, sliced the shallot as well as the purple carrot then cut the Korean rice cakes to bite size. Then cut off the dried ends of the asparagus before peeling off the skin from the bottom half of each asparagus using a peeler.

After that, started cooking and it was a breeze using the HCP to cook the fish and the Korean rice cakes. Arranged the fish, vegetables and Korean rice cakes on a plate. Took some photos before tasting. The fish was juicy and soft while the Korean rice cakes was slightly crispy on the outside and soft on the inside. Yummilicious! The Korean rice cakes looked cute too in its pretty purple color. Talk about Western-Korean fusion and creativity eh?

Marinated Cod Fish Steak


Water from boiling Asparagus and Purple Carrot


The final product

Cooked Cod Fish Steak

Dyed Korean Rice Cakes


A close-up

Ingredients (Serves 1):
1 piece cod fish steak
3 stalks asparagus - cut and peeled
1/2 purple carrot - sliced
1 clove shallot - sliced
1 clove garlic - minced
8 pieces Korean rice cakes - thawed and cut half
2 tbsp teriyaki sauce
Salt and black pepper
Olive oil

Method:
1.  Rinse and pat dry the cod fish steak with kitchen paper towel
2.  Marinate it with some salt and black pepper then set aside for 5 mins
3.  Put the asparagus and carrot in a pot of water and boil on medium-low heat for about 5 mins*
4.  Turn off the heat and arrange the vegetables on a plate
5.  Put the Korean rice cakes in the same pot of hot water to soak for 3-4mins**
5.  Preheat Happycall pan for 2 mins on low heat then put in the cod fish steak
6.  Cover and lock the pan to cook for 3 mins
7.  Flip over and cook for another 3-4 mins***
6.  Flip the pan over again, open and drizzle the teriyaki sauce over cod fish steak and let it cook for 10-20 secs
7.  Turn off the heat and set the cod fish steak on the plate with the vegetables
8.  Pour the remaining teriyaki sauce from the pan onto the cod fish steak and wipe the pan clean with a kitchen paper towel
9.  Saute the garlic and shallot with some olive oil in the Happycall pan on low heat for 1 min
10.  Drain the Korean rice cakes and add them into the pan
11.  Cover and lock the the pan to cook for 3-4 mins on medium-low heat and shake the pan every now and then
12.  Turn off the heat and arrange the Korean rice cakes on the plate with the fish and vegetables

*   The water would be boiling and turned purple due to the purple carrot
**  This is to soften and dye the Korean rice cakes to purple color
*** Open the pan and check that the cod fish steak is in the centre of the pan

Recipe submitted to Munch Ministry