Tuesday, March 29, 2011

28 Mar 11 (Mon) - Red Velvet Cake with Lemon Cream Cheese Frosting

Slept really early on Sunday night coz I knew I have to be up early the next day to start my preparation for the event. That night I was contemplating if I should do a pink marble cake or red velvet cake. In the end I decided to do the red velvet cake coz I was going to do lemon cream cheese frosting which was going to be off white color. Got up around 7+am on Monday morning and started baking by 8am. My sis commented that I was so early in baking but I said nothing. It took me about 45 minutes to do the preparation of the ingredients to putting the cake batter into the oven.

Managed to put the two cake tins side by side in the oven and set it to bake at 160 degree celsius for 25 minutes. Chatted with my sis while waiting. The oven beeped when the time was up and again the cakes peaked like the one I had on Saturday. Did the satay stick test and it came out clean for both the cakes. However, the cakes still felt a bit moist so I let them baked for another 3 minutes before taking them out to cool. Took them out of the cake tins after 5 minutes and cooled them further on a wire rack.

My sis was eating her breakfast on one end of the table while I lined other end with papers. Used a knife to cut away the peaked portion from the two cakes and offered one piece to her while I ate the other piece as breakfast. The cake wasn't as red as I had intended it to be. Think I probably didn't add enough red food coloring. After eating, I went on to do the frosting using the other recipe with a higher proportion of cream cheese and added a bit of milk and lemon juice to it. Again, in my haste, I forgot to clear away the crumbs on the cake and to chill the frosting before use. So I had to work with a slightly runny frosting which tasted great but difficult to handle.

By then my sis was already done eating her breakfast and resting on the sofa while I did my best to do my frosting. Used one of the cake tins as stand, spread the top of one of the cake with frosting, then place the other cake on top of it. Frosted the side to seal the cake then spread the rest of the frosting all over the cake and it took me quite a while to make the cake looked decent. After I was done, transferred the cake to the cake plate which I had bought, brought it to the kitchen and sprinkled some colored rice crisp around the bottom of the cake before putting the cake into the fridge to chill.

Cleared the table and kitchen before heading out to Tampines to get lunch, flowers and some icing deco for the cake. Well, I had underestimated the amount of frosting to make and so it was only enough to cover the cake but didn't have extra for piping deco. Anyway, the frosting was not suitable to do piping or deco. Headed off to get lunch then to the flower shop at Tampines 1 basement to get a single stalk bouquet at $12 before going to The Icing Room to get icing deco in the shape of flower at $2 for 3.

Headed back and ate my lunch, took some photos of the cake before putting the three icing deco onto the cake and took a few more photos. Initially I thought I could hide the cake from my niece and nephew in the cake box that I bought but I underestimate the height of the cake so in the end I had to risk my nephew asking to eat the cake. The rest of the day was normal, went swimming with my sis and then helped her with the cooking. Ate dinner with the rest and then while watching tv, I couldn't resist and told my niece about my plan which was to set up the flowers and the cake with candle while my sis was taking her shower, then light the candle when she walked out of her room. My niece then passed the message to her older brother.

So finally my sis came out from her room after shower and it was already 9+pm. Lit the candle and waited for her. I thought my niece would come out with her but she didn't, my nephew was glued to the laptop, engrossed in his games while my BIL was snoozing on the sofa. Either my sis's didn't seem surprise by the cake and flowers or she had concealed it very well. I took photos of her with the cake and also when she cut the cake. Then I brought plates and forks to eat the cake.

My niece came out and my sis cut a slice for her, then for me and for herself. My BIL was not a cake lover and so didn't offer him any and after sometime, my nephew came over for the cake. My niece went for second helping and then my sis cut half of the remaining cake for me to bring to office as breakfast while the other half was kept in the fridge for the next day. My sis commented that the frosting was softer this time and not as sweet as the one I made last Saturday. After she cleared the table and cleaned the dishes, she went to rest on the sofa while my niece did her homework at the dining table. My BIL continued to snooze and my nephew continued with his games.

I had this idea of baking a cake for my sis on her birthday since last year and last year I failed miserably coz the cake came out hard as rock. I was glad this year the idea came through. Initially I thought we could all gather around to celebrate my sis birthday and I could have a photo taken with her and the cake but that didn't come true. I don't know whether I should be happy that I manage to accomplish the mission of baking a decent cake for my sis or disappointed at the outcome of my plan. Whatever the case, I hope she was able to feel the effort that I had put in and be happy.


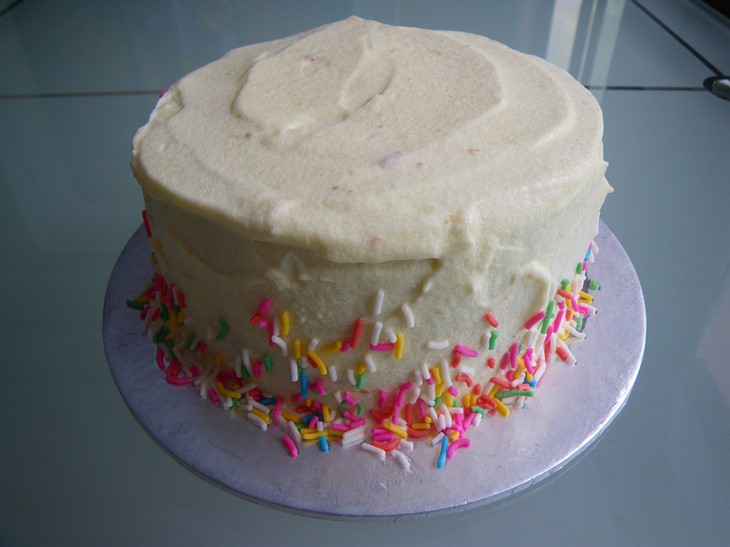
Cake before adding flower shape icing


Sis preparing to cut the cake
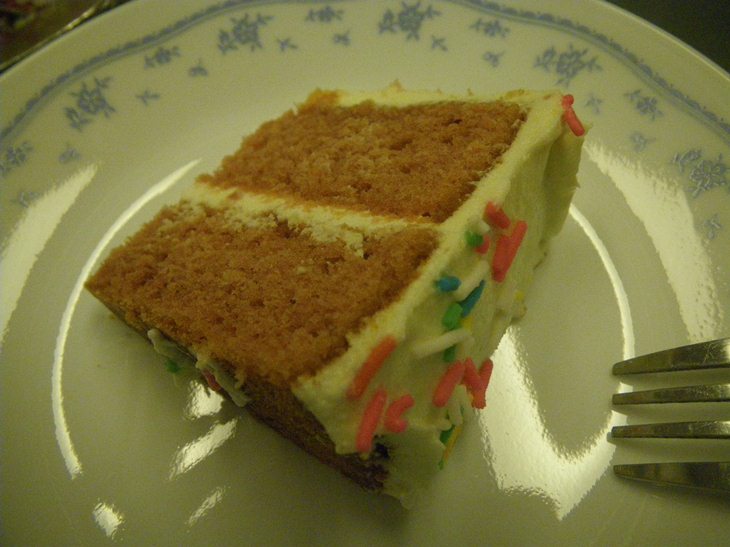

A piece of the cake


Cake after adding flower shape icing


Sis cutting the cake


Flowers for my sis

Ingredients (Cake):
100g butter - soften
100g castor sugar
118g self-rising flour
2 eggs
30ml milk
1 tsp vanilla essence
2/3 tbsp cocoa power
a few drops of red food coloring

Method:
1.  Pre-heat the oven to 160 degree celsius
2.  Grease two 4cm deep x 12cm wide round cake tins
3.  Place all the ingredients in a large bowl
4.  Beat with an electric mixer for 2 mins till smooth
5.  Pour cake batter into prepared cake tins
6.  Bake for 25mins until risen and firm to touch
7.  Transfer to a wire rack and allow to cool

Ingredients (Lemon cream cheese frosting):
30g butter - soften
120g cream cheese - soften
84g icing sugar
a few drops of milk
a few drops of lemon juice

Methods:
1.  Beat all the ingredients with an electric mixer till smooth

Saturday, March 26, 2011

26 Mar 11 (Sat) - Chocolate Cake with Purple Cream Cheese Frosting

At my sis's place again. Didn't follow her to Giant supermarket so that I can have the whole morning alone in her house to try baking before the final event on Monday. Followed back my cupcake recipe without changing anything this time and then baked it at 160 degree celcius for about 25 minutes.

Again the top peak and cracked slightly. I also noticed that the last round and this round, the side of the cakes seem to shrunk from the side of the tin and sunk a little. Read the instruction manual of the steam oven and one of the baking tips was not to grease the side of the cake tin if the side shrunk and sunk. Perhaps I should just grease the base of the cake tin next time.

Took the cake out to cool and then cut away the top of the cake that had peaked. Then went on to do the cream cheese frosting and frost the cake. Inverted the cake tin to use it as a stand so that I could frost the cake. In my haste, I had forgotten to clear the crumbs before I frost and also forgot that I should frost the side first before the top.

This was the first time that I'm doing cream cheese cake frosting and it was much harder than I thought. My hands weren't steady enough and so the frosting wasn't as smooth as I had expected. After I had finished frosting, sprinkled some colored rice crisp over the top of the cake. Took some photos and put it in the fridge. Read somewhere that it will be easier to frost the cake if the cream cheese frosting is chilled. Perhaps can try that on Monday.

Scraped the remaining frosting off the mixing bowl and spreaded onto the top of the part of the cake that I had cut earlier on and ate it. Didn't taste that bad. From today experience, I can see two options. Either I do the same as what I have done today but do twice the amount on Monday; or I can use the cake mix that I bought last week. Still have about one and a half day to decide.

Before frosting - Top view


After frosting - Top view


Before frosting - Side view

After frosting - Side view

A piece of the cake

Ingredients (Cake):
50g butter - soften
50g castor sugar
59g self-rising flour
1 eggs
15ml milk
1/2 tsp vanilla essence
1 tbsp cocoa power

Method:
1.  Pre-heat the oven to 160 degree celsius
2.  Grease one 4cm deep x 12cm wide round cake tin
3.  Place all the ingredients in a large bowl
4.  Beat with an electric mixer for 2 mins till smooth
5.  Pour cake batter into prepared cake tin
6.  Bake for 25mins until risen and firm to touch
7.  Transfer to a wire rack and allow to cool

Ingredients (Cream cheese frosting):
10g butter - soften
27g cream cheese - soften
57g icing sugar
1 drop of blue food coloring
2 drops of red food coloring

Method:
1.  Beat the butter, cream cheese, sugar and food coloring with an electric mixer till smooth

Monday, March 21, 2011

21 Mar 11 (Mon) - Purple Vanilla Cake with Blueberry Jam

Well... this month I was doing intensive baking practices mainly because I was thinking of baking a cake for someone dear to me on her birthday. Only have one more practice session next week before the actual event next Monday and I wasn't quite successful so far. Then yesterday I was in the supermarket doing some groceries shopping and I saw a buttercake mix which only cost $3.90. Therefore, I bought a box just in case I'm not successful again I still have the cake mix to fall back on.

Didn't have to work today and so decided to bake again. So decided to stick to the basic vanilla cupcake recipe with a couple of tweaks. Firstly, I used buttermilk instead of just milk and secondly, I added red and blue food coloring to make it into purple color.

Wasn't careful and added more than one drop of blue food coloring so in the end I had to add more red food coloring to make it purple. Set the temperature to 165 degree celcius and let it bake for 20 minutes. Initially it was rising nicely but after 10 minutes, the top started to crack again. At the end of the baking time, did the satay stick test and it didn't come out clean so let it baked for another 5 minutes.

After 5 minutes, I did the satay stick test and this time it came out clean. So took it out to cool on the counter and something strange happened, it started to shrink. When I took the cake out, it was rather flat and I was very disappointed so didn't have the motivation to do the frosting.

So the next best thing to improve the cake was to cut the cake into halves and spread some blueberry jam in between. Took some photos and tasted my creation. Though the satay stick came out clean, the bottom of the cake actually wasn't well risen. I only found out about it when I cut the cake.

The taste wasn't as good too and it was only when I wrote this post that I realised that although I wrote that I should add 25ml of milk, all along I had always been adding only about 15ml of milk instead. So I don't know if the shrinking problem is due to the buttermilk used or the amount used. Anyway, I have decided that I'm going to use my insurance policy - the buttercake mix - for the event next Monday to be on the safe side and also to stop wasting all the flour, sugar, butter, etc due to the ever rising inflation.

Outside

Inside

Ingredients:
50g butter - soften
50g castor sugar
59g self-rising flour
1 eggs
25ml buttermilk (refer to http://fly2food.blogspot.com/2011/03/19-mar-2011-sat-marblecake.html)
a couple drops of red food coloring
a couple drops of blue food coloring
1/2 tsp vanilla essence

Method:
1.  Pre-heat the oven to 165 degree celsius
2.  Grease one 4cm deep x 12cm wide round cake tin
3.  Place all the ingredients in a large bowl
4.  Beat with an electric mixer for 2 mins till smooth
5.  Pour cake batter into prepared cake tin
6.  Bake for 25mins until risen and firm to touch
7.  Transfer to a wire rack and allow to cool
8.  Cut cake into two halves
9.  Spread blueberry jam on one half and replace the top half of the cake

Saturday, March 19, 2011

19 Mar 11 (Sat) - Rainbow Cake

Found another recipe for red velvet cake and wanted to try it out. The recipe calls for buttermilk but I didn't want to buy it coz the smallest packet is 600ml. So googled for a substitute and was told that one can create buttermilk using milk and lemon juice. The recipe also calls for white vinegar but found another recipe that says that one can use apple vinegar as substitute. Then I went on to tweak the recipe a little by adding blue food coloring to make it into a marble cake.

Followed the recipe closely and towards the end when I had to add the baking soda solution, I panicked a little coz the recipe said that after adding the baking soda, the cake batter had to be poured into the baking tin quickly and put into the oven to bake.

So separated the basic cake batter into three portions, added red food coloring to one and blue food coloring to the other. Then poured the baking soda solution to the three portions and quickly poured them into the baking tin and sent it into the oven. In my haste, I forgot to stir the cake batter a little to twirl the color a bit.

Set the temperature to 150 degree celcius and baking time for 20 minutes. Initially the sides of the cake rose but the middle sank. After 10 minutes, I increased the temperature to 160 degree celcius. The middle part rose and it looked just fine. When the baking time was up, used a satay stick to test it out and the middle portion was still wet.

It seemed that there was a big air bubble formed between the batter and the top layer of the cake such that the heat could not reach the batter in the middle. So had to put the cake back into the oven and baked for another 10 minutes at 150 degree celsius. When time was up, did the satay stick test again and this time it came out clean. However, I baked the cake for another 2 minutes more just to be sure.

Took the cake out to cool and was contemplating if I should proceed to do the cream cheese frosting. In the end, I didn't do the frosting. Firstly because the cake didn't look very nice; secondly, I didn't have enough butter to make enough frosting to cover the whole cake. So I just cut the cake into 12 equal pieces and took a couple of photos.

Tasted my creation and found that this cake has a bit too much of flour taste as compared to the other cake recipe that I have been using. Think I will stick to my previous recipe in the next round and improve on it.

Outside

Inside

Ingredients:
56.5g butter - soften
150g castor sugar
187.5g self-rising flour
1 eggs
125ml buttermilk (117.5ml milk with 7.5ml lemon juice and let it stand for 5 minutes)
a few drops of red food coloring
a few drops of blue food coloring
1/2 tsp vanilla essence
1/2 tsp vinegar
1/2 tsp baking soda
1/2 tsp baking power

Method:
1.  Pre-heat the oven to 150 degree celsius
2.  Beat the butter and sugar till light and fluffy
3.  Add in the egg, vanilla essence, flour and buttermilk and beat till smooth
4.  Grease one 8" x 8" cake tin
5.  Divide the mixture into three portions
6.  Add a few drops of red food coloring to one portion and blue coloring to another portion
7.  In a small bowl mix the vinegar and baking soda
8.  Add the baking soda solution to the three portions of the cake batter and mix in quickly
9.  Pour into the cake tin and place into the oven
10.  Bake for 32mins then take it out to cool

Monday, March 14, 2011

14 Mar 11 (Mon) - Red Velvet Cupcakes and Red Velvet Cakes

Didn't have to work today and so decided to attempt the red velvet cupcakes recipe again. Started baking at 9.30am and took me 1.5 hours to finish the preparation. This time I used double the amount that I used yesterday and made some adjustments to the amount of milk and red food coloring added. The cake batter was of nice velvety red and was enough to fill up two 5" x 3" cake tins plus four cupcake cases.

Put everything into the oven and set it to bake at 165 degree celsius for 15 minutes. The cakes rose to a nice flat level and tested them after the baking time was up. The satay stick came out clean for the cupcakes but not for the cakes. Baked all of them at the same temperature for another two minutes and then took out the cupcakes to cool.

Baked the two small cakes at 170 degree celcius for another seven minutes before testing them again. This time the stick came out clean but the top cracked badly. So took them out to cool on the counter and took some photos of the cake and . Contemplated whether I should do the buttercream frosting or the glace frosting for the cakes but in the end, laziness got the better of me. Besides, it would be difficult for me to bring the cakes back to office with the frosting on the cakes.


Red Velvet Cupcakes

Red Velvet Cakes

The center of the Red Velvet Cake

Ingredients:
100g butter - soften
100g castor sugar
118g self-rising flour
2 eggs
25ml milk
15ml red food coloring
2/3 tsp vanilla essence
1 tbsp cocoa power

Method:
1.  Pre-heat the oven to 165 degree celsius
2.  Line 4 silicon muffin cases with cupcake cases
3.  Place all the ingredients in a large bowl
4.  Beat with an electric mixer for 2 mins till smooth
5.  Divide the mixture evenly between the cake cases and two 5" x 3" cake tins
6.  Bake for 15mins until cupcakes risen and firm to touch
7.  Transfer to a wire rack and allow to cool
8.  Bake the two cakes at 170 degree celsius for another 7 mins

Sunday, March 13, 2011

13 Mar 11 (Sun) - Red Velvet Cupcakes with Buttercream Frosting

Thought I could do some baking yesterday but wasn't able to borrow the baking stuff till the afternoon and the butter was too hard to use. So in the end had to wait till today before I could finally bake. My sis's SIL didn't have red food coloring and so thought I could only try the vanilla cupcakes with chocolate cream frosting. My sis woke me up in the morning to say that she would be going to the market and so asked her to help get the red food coloring. Started baking at 9am and followed the recipe that I had previously but this time I added a bit of milk to it, hoping that the top wouldn't crack during baking. On top of that, I also added some red food coloring hoping to make the cupcakes red color.

With the same amount of ingredients that I had used previously, this time I lined five cupcake cases instead of four and the cupcakes rose to just the right level. However, the top still cracked at the end of the baking time and I didn't add enough coloring to make the cupcakes red enough. Took them out and the kids wanted to eat them. Asked if they would like to have some frosting to go with the cupcakes and they said yes. So went on to make the buttercream frosting using the same recipe I had previously but this time I added some milk to it.

Finally worked on the piping but it wasn't as easy as the last round coz the frosting was a bit watery this time. Once I was done, sprinkled some colored rice crisp and took some photos of my creations before eating them.

By adding some milk to the cake batter, the cupcakes tasted better and not so dry as the last round. By adding some milk to the buttercream frosting, the frosting was not as stiff as before and the colored rice crisp were able to stick better. I guess the next round I can still add milk to the cake batter, add more red food coloring and bake at a lower temperature. As for the frosting, I should use less milk so that it won't be too watery.


Before frosting

After frosting

Ingredients:
50g butter - soften
50g castor sugar
59g self-rising flour
1 eggs
15ml milk
2ml red food coloring
1/2 tsp vanilla essence
1 tbsp cocoa power

Method:
1.  Pre-heat the oven to 180 degree celsius
2.  Line 5 silicon muffin cases with cupcake cases
3.  Place all the ingredients in a large bowl
4.  Beat with an electric mixer for 2 mins till smooth
5.  Divide the mixture evenly between the cake cases
6.  Bake for 18mins until risen and firm to touch
7.  Transfer to a wire rack and allow to cool

Ingredients make 5 (Buttercream Frosting):
30g butter - soften
50g icing sugar
1 tsp milk

Method:
1.  Beat the butter, sugar and milk with an electric mixer till smooth and creamy