Sunday, June 17, 2012

17 Jun 12 (Sun) - Aglio Olio 4-Cheese Ravioli and Black Glutinious Rice Porridge Ice Cream [Bubur Pulut Hitam Es Krim] (黑糯米粥冰淇淋)

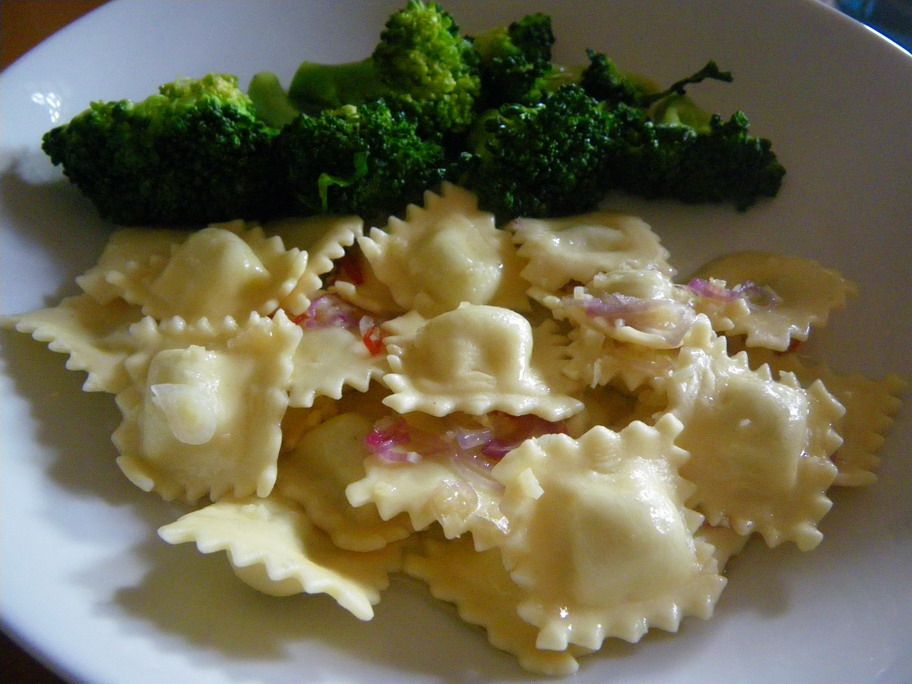
While doing marketing at Carrefour last Friday, I bought a pack of ravioli. The packaging was in French so I could not read how to prepare the ravioli. Therefore, I had to cook it my own way by just boiling them. Since I didn't get any cream sauce or tomato sauce, hence had to just make the ravioli the aglio olio way. Hrm... I still miss the one I had from "Lavelle Street Café" in Advancetown, Brisbane.


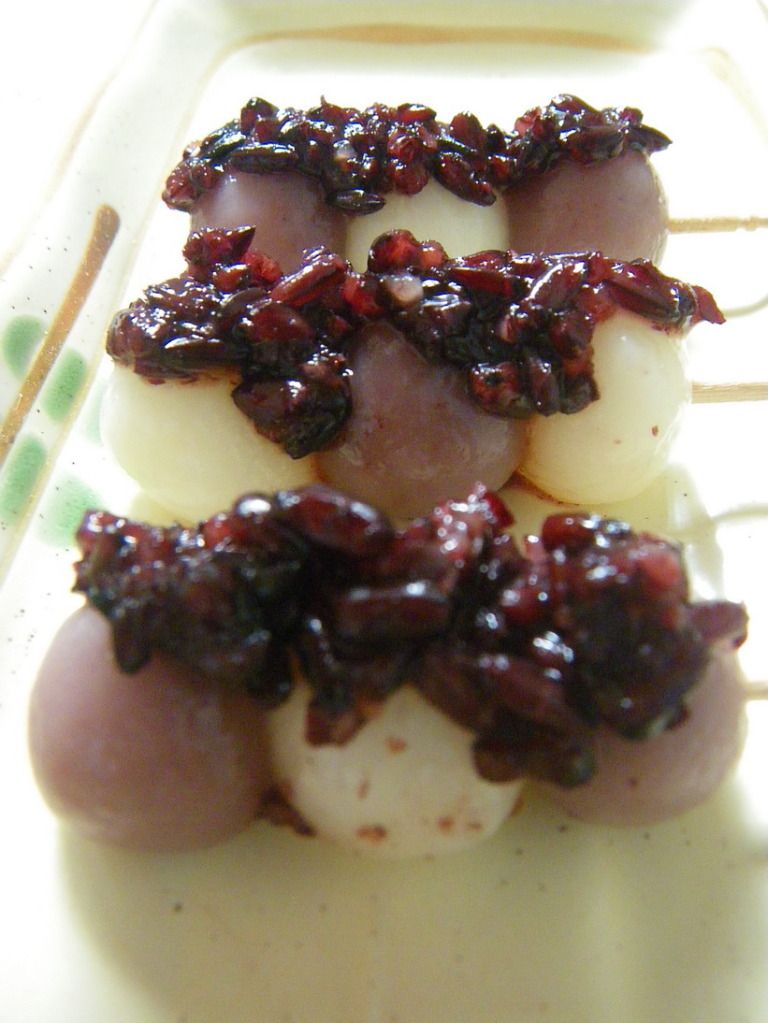
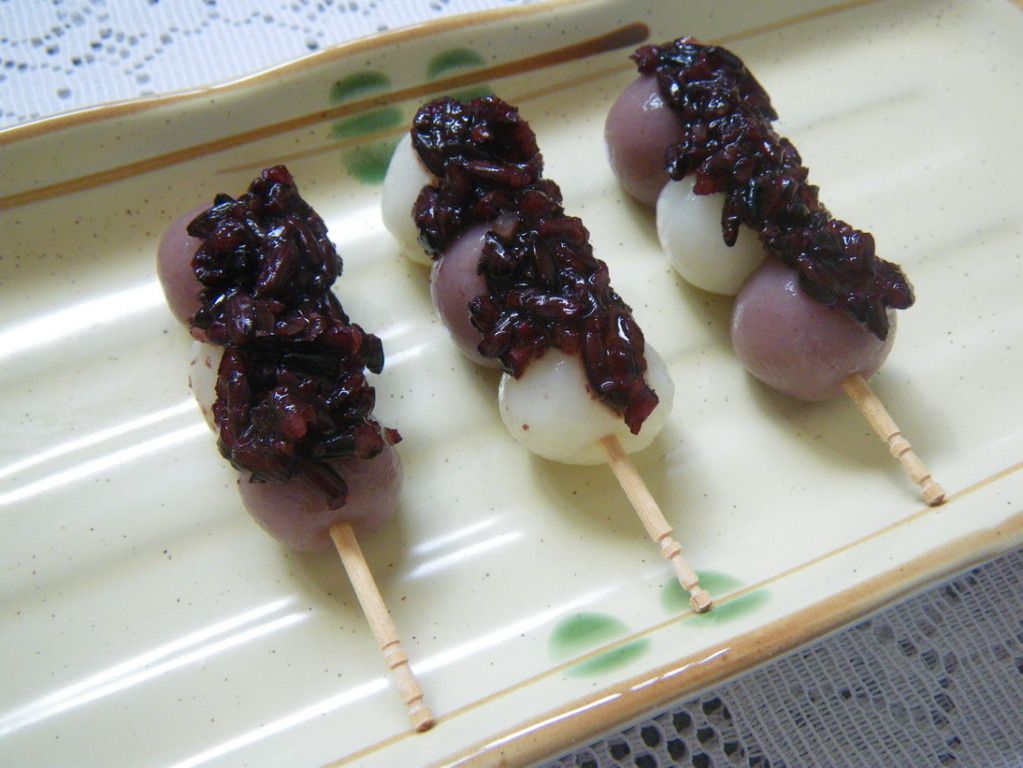
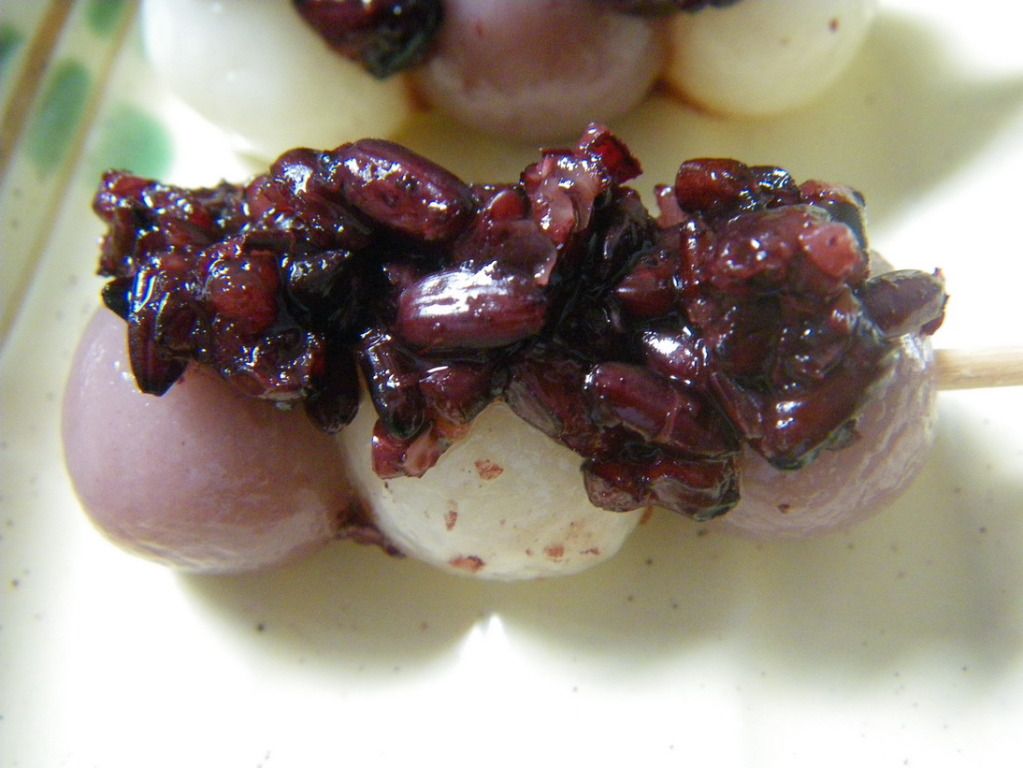
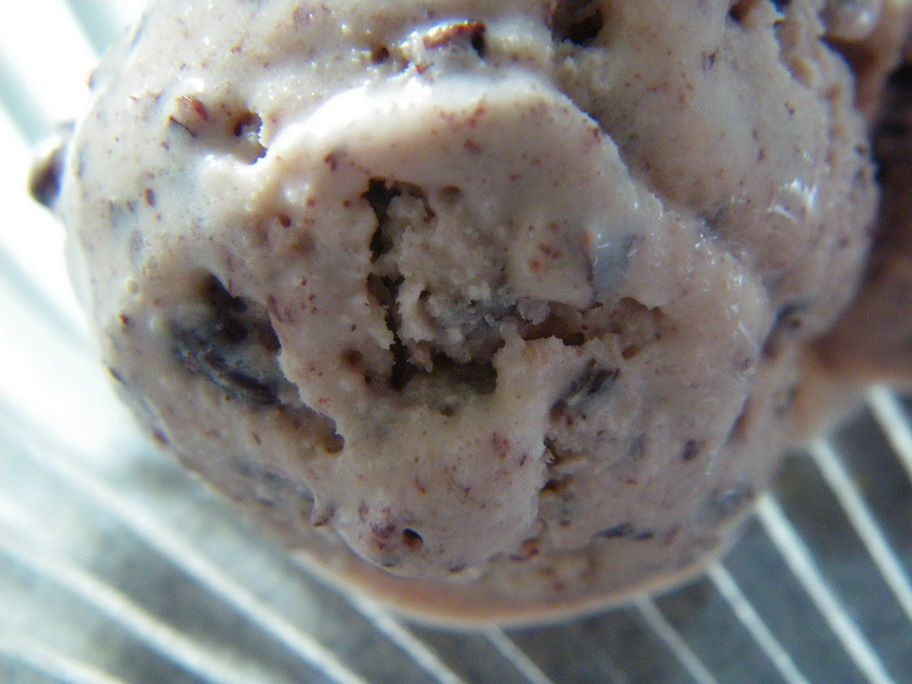
Yesterday made bubur pulut hitam ice cream so today took it out from the freezer to try. It was very hard and I had to thaw it for about 10 minutes before it can be scoop easily. Taste wise, the bubur pulut hitam taste was not intense and I think it would have been better if I had put less of the glutinous rice and added the syrup instead because texture wise, I think it is tiring for the jaw to have to chew the glutinous rice. Did try to blend the mixture yesterday hoping to breakdown the glutinous rice to smaller bits but wasn't very successful. Hrm... Maybe I should have made them into popsicle instead just like the red bean potong.


Ingredients:
1 cup black glutinous rice porridge*
140ml evaporated milk
200ml coconut milk
6 tsp icing sugar

Method:
1.  Mix all ingredients together in a blender and blend for 3 minutes
2.  Pour into a container of your choice and put into the freezer
3.  Take out after 2 hours to churn
4.  Repeat for another 2-3 times and leave in the freezer to freeze overnight

* About 50g of black glutinous rice yield one cup

Saturday, June 16, 2012

16 Jun 12 (Sat) - Grapefruit Juice and Bubur Pulut Hitam Dango

Bought a Toyomi blender from Tangs last Saturday and wanted to try it out this weekend. Went marketing at Carrefour yesterday and saw some grapefruits. I remembered Dr. Oz mentioned something about drinking grapefruit juice to lose weight so bought two to try them on the blender. Grapefruit juice on its own doesn’t taste so good, therefore, I added one tablespoon of Happy Sheep strawberry honey to it. The result was yummy!


After the previous attempt at the coco nana ice cream and some reading up, it seems that instead of just using whipping cream to make ice cream, the alternative is to use evaporated milk and coconut milk. Using the coco nana ice cream recipe as a guide, I had this idea of creating the bubur pulut hitam ice cream. So soaked the black glutinous rice overnight and cooked them early this morning. Then measured about one cup of the cooked glutinous rice and added them to the evaporated milk and coconut milk and blended using the blender. True to what I read, the whisked evaporated milk increased in volume tremendously compared to my previous attempt of just whisking using a hand whisk. As the mixture wasn’t sweet enough, I added another six teaspoons of icing sugar before pouring into a container and chucking into the freezer. Will only know the taste tomorrow.

Since I still have some bubur pulut hitam left, I used the syrup to make dango. The uncooked dango were light purple in color and one thing I noticed was that using the syrup to form the dough, the dough wasn’t as sticky as the one formed using just hot water. I wonder why. Boiled the uncooked dango and once they floated, transferred them to cold water then drained them before skewering. Didn’t pan-fry them this time round and just pour some bubur pulut hitam over the skewered dango. The syrup gave a nice purple color to the dango after they were cooked; however, the bubur pulut hitam didn’t stick well to the dango like anko does.

The uncooked dango in white and light purple:


Some photos of the cooked dango with bubur pulut hitam on the newly acquired plates :


Tuesday, June 12, 2012

12 Jun 12 (Tue) - Mitarashi Kushi Dango

Last week I made song pyeon and I tried to heat them up the next day using the Happycall pan and some oil. Surprisingly, the slight crispy skin made them rather tasty. So yesterday I did a search on the Internet using "grilled rice balls". The results were grilled sushi rice balls which was not what I wanted. So did a more refined search and found that what I wanted was actually called dango.

Upon more searches, I realised that there are many different types of dango and most of the recipes found were on mitarashi dango. Saw one by Nami of Just One Cookbook but her recipe calls for both non-glutinous rice flour and glutinous rice flour. I only have the latter and so went on to post on her blog asking if I can just use glutinous rice flour and she said it is possible. Then I saw another recipe by Terri of Hunger Hunger which only uses glutinous rice flour and she said her sauce is better than most because she doesn't use cornflour to thicken the sauce.

Did a few more searches and found another recipe on hanami dango, I was attracted to the pretty colors of the dango so I began brainstorming. Thought I will try making the mitarashi kushi dango tomorrow evening then I can make use of today and tomorrow afternoon to source for nice plates for the photo shoot. However, my impatience got the better of me and so here we are.


After boiling and skewered

After drizzling with mitarashi sauce

After pan frying


A close-up

Ingredients (Make 12):
25g glutinous rice flour
1 tsp sugar
hot water
1 tsp oil
a drop of blue food coloring                                            
Ingredients (Sauce):
1/2 tbsp light soya sauce
1/2 tbsp mirin
2/3 tbsp sugar
2 tbsp water

Method:
1.  Mix glutinous rice flour with sugar
2.  Divide the mixture into two portions
3.  Add hot water little by little to one portion of the mixture and knead the dough with hands
4.  Tear out some dough and roll it between the palms to make rice balls
5.  Add a drop of blue food coloring to the hot water to make a light blue solution
6.  Repeat step 3 and step 4
7.  Bring some water to a boil in a pot and add in the rice balls
8.  When the rice balls float, remove them from pot and place into a bowl of ice water for 5 minutes
9.  Drain the rice balls and skewer them three to a stick
10.   Heat up the oil in a non-stick pan over low heat and roll the skewered rice balls around for about 5-8 minutes
11.  Turn off the heat and arrange the skewered rice balls on a serving plate
12.  Boil all the sauce ingredients over low heat till thicken*
13.  Turn off the heat, drizzle the sauce over the rice balls and serve

* Amount of sugar and light soya sauce can be adjusted to taste

Sunday, June 10, 2012

10 Jun 12 (Sun) - Rosti (Happycall Version #2)

About three months ago, I tried cooking rosti using the Happycall pan and commented that it was no difference from using normal non-stick pan coz I still had to put oil and flip the rosti using the usual method. Recently, while browsing the Munch Ministry website, I saw a rosti recipe cooked using the Happycall pan posted by a member. The recipe states that potatoes don't have to be cooked beforehand and no oil is added. So I tried it out today and the result?

The rosti was was very soft and there were a lot of water droplets on the cover of the pan when I opened it after four minutes. Tried to flip the rosti over by flipping the pan and the rosti was still stuck to the top side of the pan. So had to flip the pan back and try to unstick the rosti from the pan. Then drizzled some oil over the rosti before flipping the pan over and cooked with the cover open. It took quite a while for the rosti to be crispy and the end result was not the same as those from my own recipe.

Also after I was done with the first rosti,  when I wanted to add the rest of the shredded potatoes into the pan, I saw brown liquid collected at the base of the pot where I put the shredded potatoes. I wonder what has caused that to happen. Could it be due to the types of potatoes used or coz of the fact that they were raw? Overall, the method of cooking didn't differ much from my own. I would prefer to cook the potatoes beforehand coz I find that the resulted rostis have a lighter texture instead of being compact and dense.

Shredded Potatoes


First Rosti

Second Rosti

Monday, June 4, 2012

4 Jun 12 (Mon) - Song Pyeon

After serveral failed attempts at making song pyeon and yesterday's failure at making the sweet rice and pumpkin tteok, I decided to give song pyeon another try. Googled for recipes and I got confused because some recipes called for glutinous rice flour while some called for non-glutinous rice flour.

As I only have glutinous rice flour so had to use that instead. And since I still have some pumpkin paste left, so used that as the filling and even mixed a bit of it to make the dough. This time I used the boiling method, the result were not too ugly but still nowhere close to the actual song pyeon which has more shape and volume. Mine were more towards the flat side. I wonder if it has anything to do with the type of flour used or the method of cooking which should have been steaming.


Normal plain dough


Uncook song pyeon

Dough with pumpkin paste added


Cooked song pyeon

Close-up

Sunday, June 3, 2012

3 Jun 12 (Sun) - Pan-fried Fish with Korean Sweet & Spicy Sauce Pasta

It has been a few weeks since my last cooking session. Been brainstorming about what to cook and had a few ideas in mind. Put three ideas to test today and only two were successful. The three ideas were:

1.   Pan-fried Fish with Korean Sweet & Spicy Sauce Pasta
2.   Wasabi Potato Salad
3.   Sweet Rice & Pumpkin Tteok

The first one was quite good surprisingly. The sweet and spicy sauce went really well with the savoury pan-fried fish.


Pan-fried Fish with Korean Sweet & Spicy Sauce Pasta

Ingredients:
75g angel hair
1 piece fish fillet
1/2 onion, cut rings
1 red chili, cut strips
some spring onion, cut into 2"                                            
salt and pepper
2 tbsp oil
cornflour
Ingredients (Sauce):
2 tbsp sugar
dash of pepper
1 bowl of water
1 tsp minced garlic
1/2 tsp light soya sauce
2 tbsp Korean red pepper paste


Method:
1.  Rinse and pat dry fish fillet with kitchen towel
2.  Marinate fish fillet with salt and pepper and set aside
3.  Cook angel hair in salt water and arrange on a serving plate
4.  Coat fish fillet with cornflour
5.  Add 2 tbsp oil to Happycall pan
6.  Fry fish fillet each side for about 5 minutes over low heat
7.  Turn off the heat and arrange fish fillet on the same serving plate
8.  Mix all the sauce ingredients in a bowl and pour into Happycall pan
9.  Cook over medium-low heat and stir constantly till sauce thicken slightly
10.  Add onion, red chili and spring onion and cook for another 1-2 minutes
11.  Turn off the heat and pour sauce over the angel hair
12.  Garnish with more spring onion and serve

The second one was basically just adding wasabi paste to my original potato salad. The third one was an epic failure. Managed to make the pumpkin paste using the Japan green pumpkin and perhaps the rice dough but it was the handling of the dough and wrapping the pumpkin paste that gave me problem. So in the end, I got very ugly tteok and fortunately, I didn't make a lot.

Pumpkin Paste and Wasabi Potato Salad


Recipe submitted to Munch Ministry